
Create A Better Reality Scan by Mapping High Resolution Color Images To Any 3D Model with Free Tools
Today we’re going create a better reality scan be adding seamless full-color mapping to a Monochrome 3D model scanned using a 3D scanner.
All we’ll need is the open source program Meshlab and this series of photographs of our model. I’ve been using this process in visual effects, and I find the control Meshlab gives you over every step to be worthwhile.
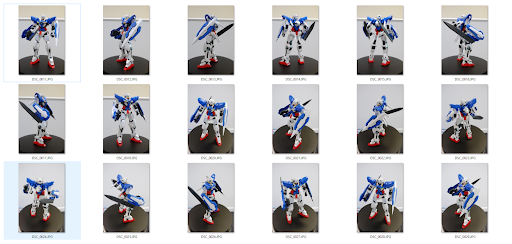
Series of photographs of our model
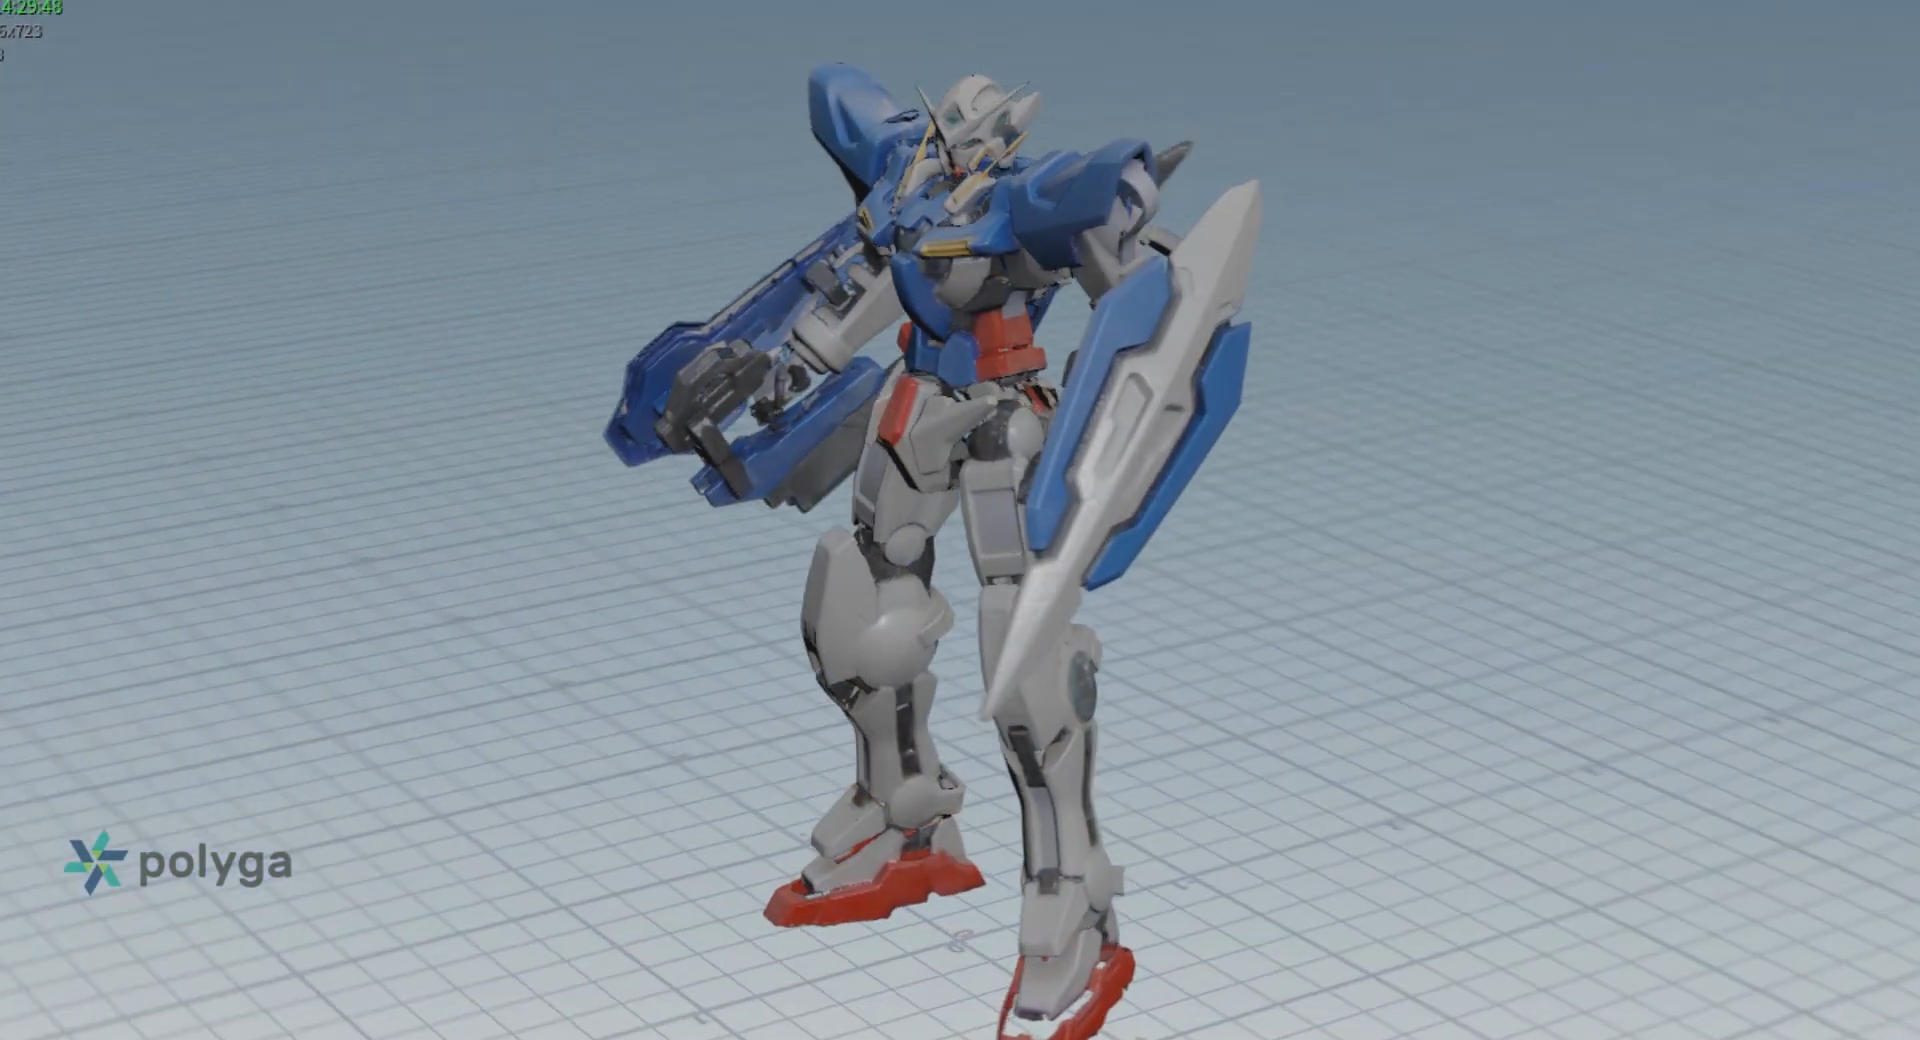
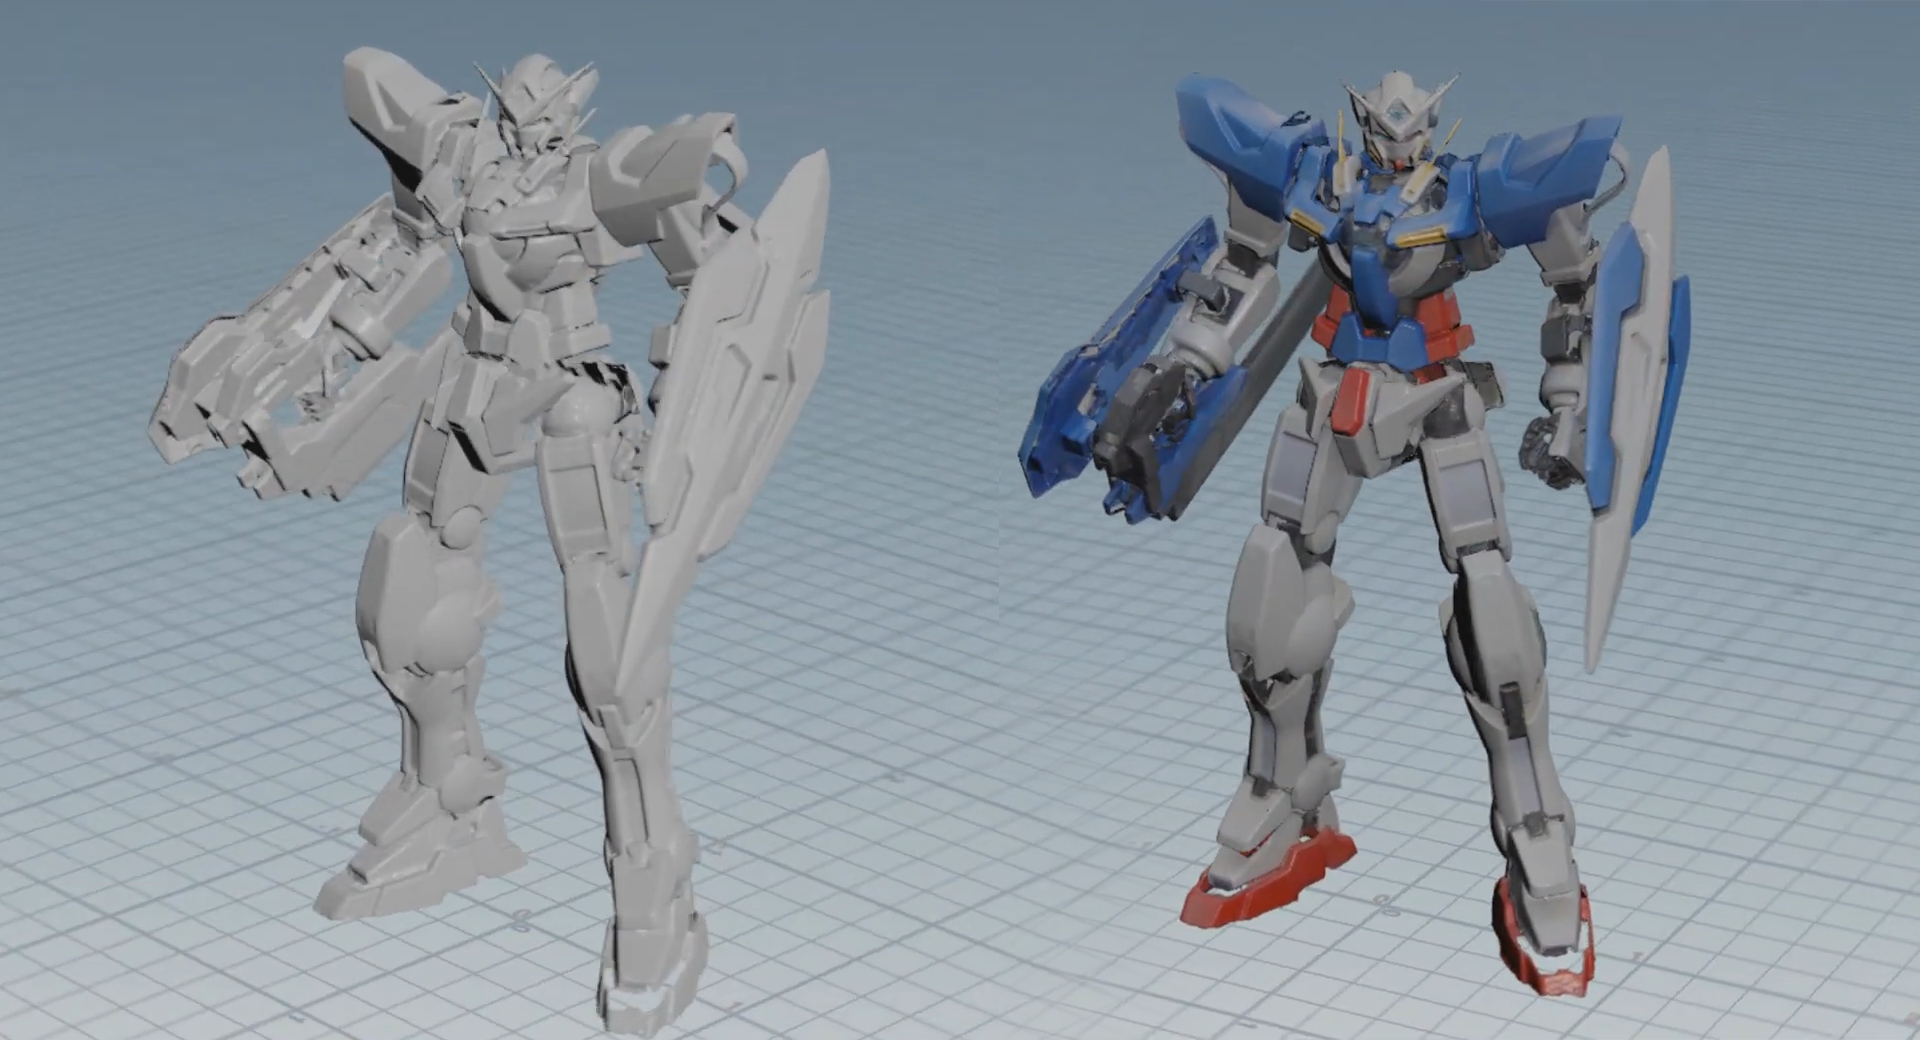
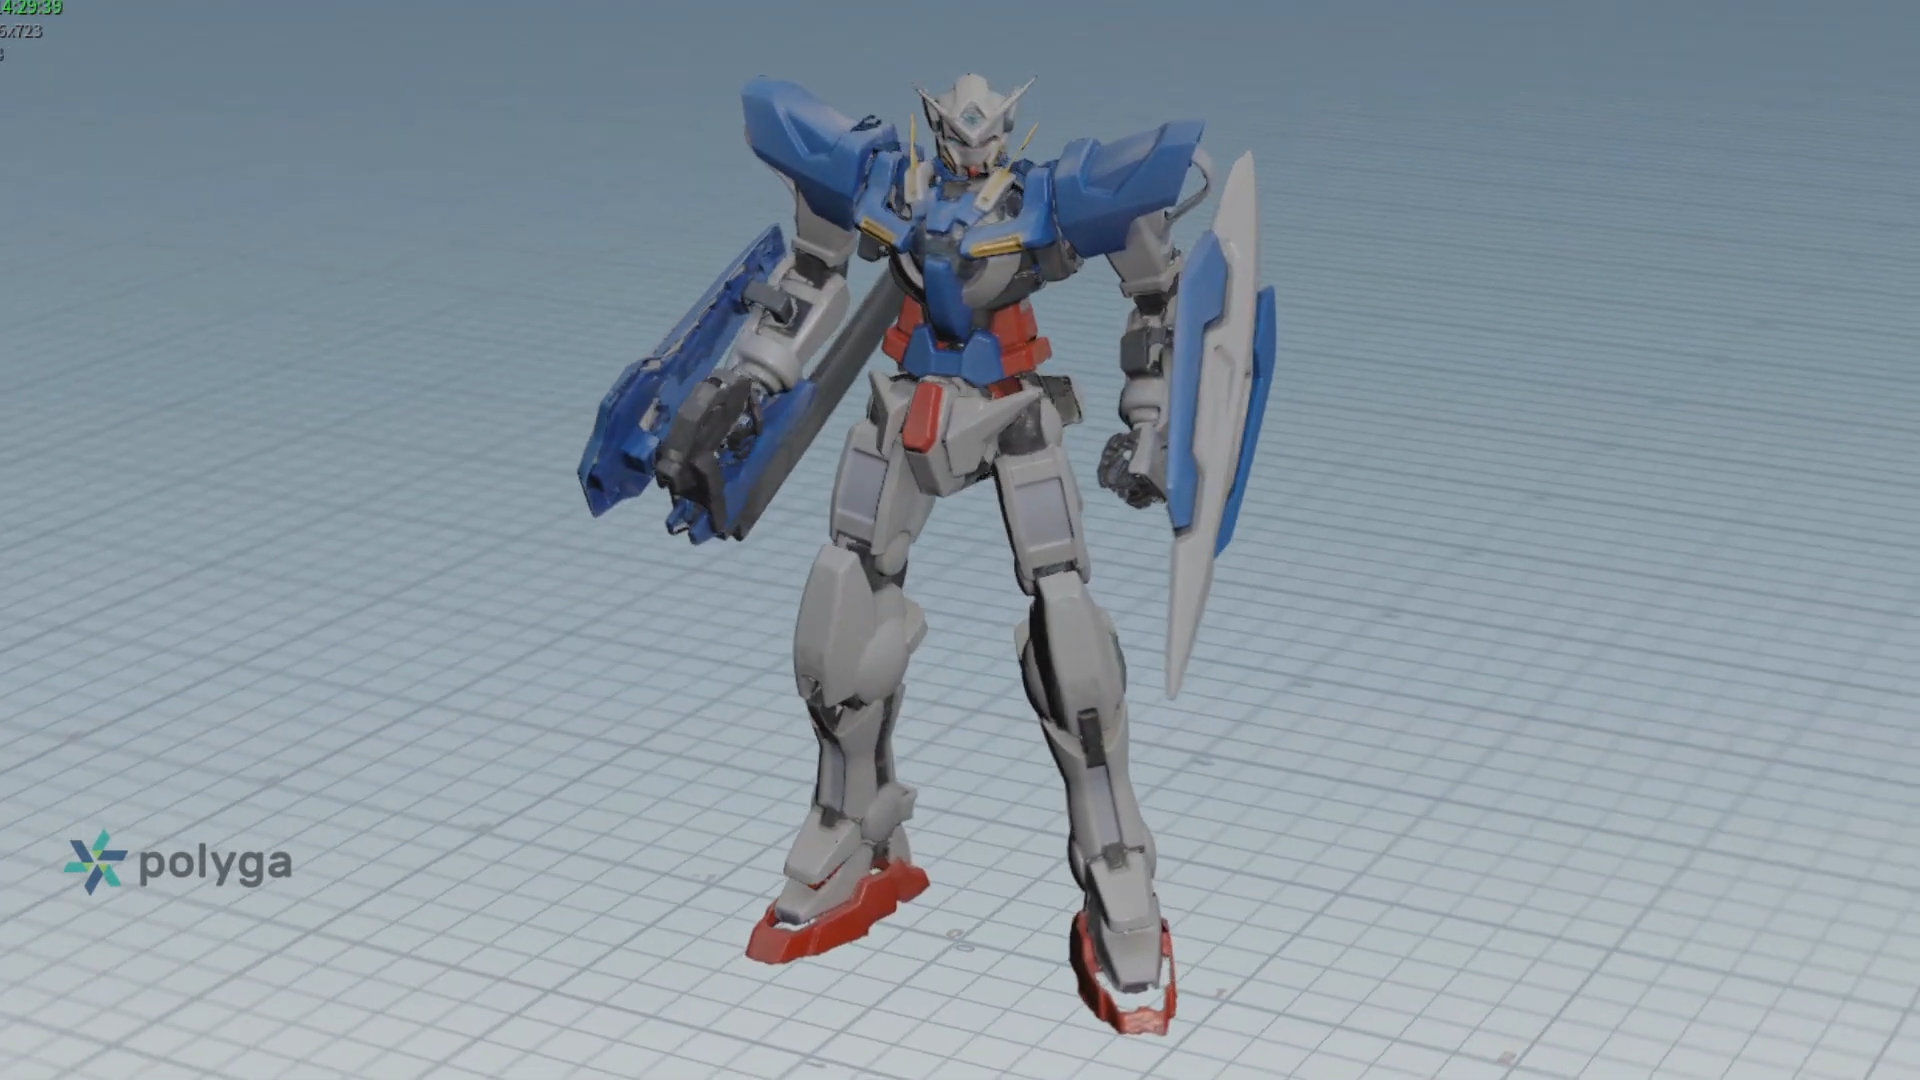
Here’s the end product. Look how well it’s blended the projections of each photo, and I can’t see any seams which makes the detail fantastic. We even picked a tricky model to really give Meshlab a workout, and you can see how well its weighting algorithms preserved the color details.
Let’s get Started on this Reality Scan!
With Meshlab open the first thing we need to do is bring in our 3d mesh. From the file menu select import mesh.
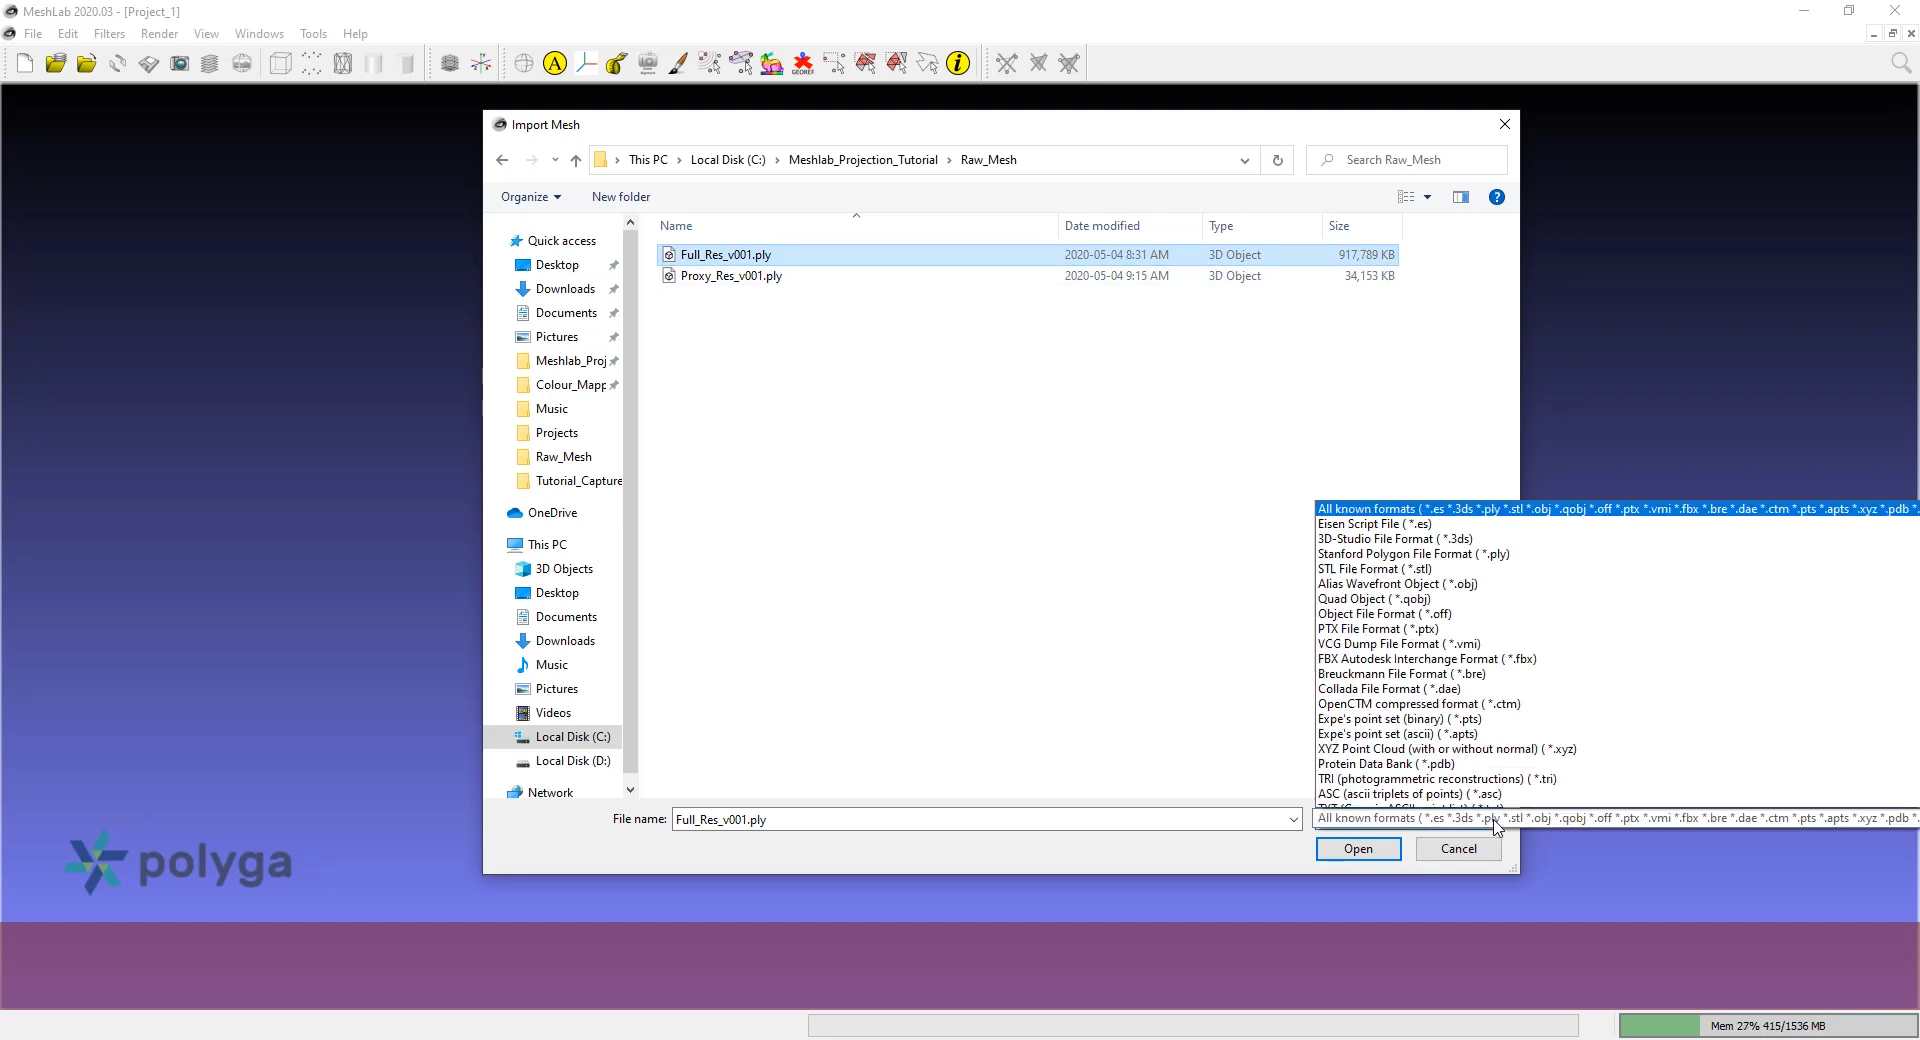
Locate the file of the 3D mesh you would like to import.
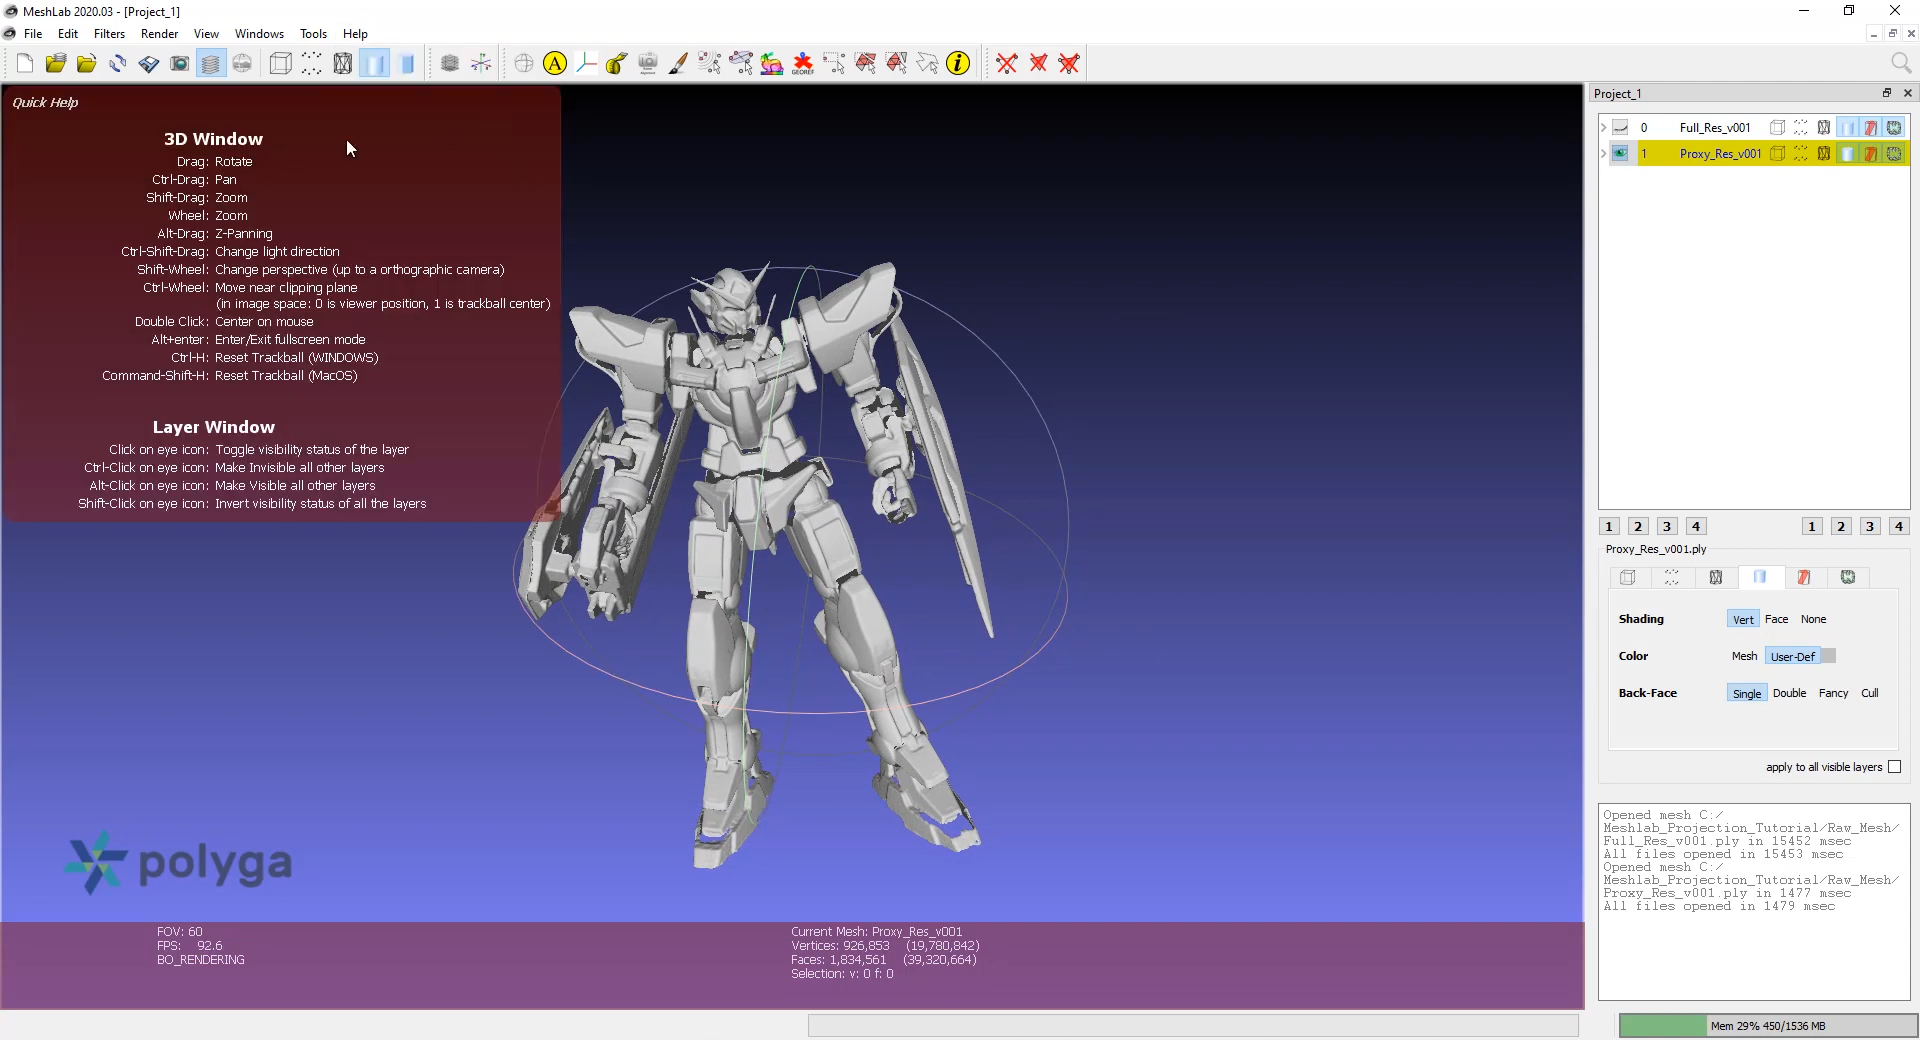
I’ll be bringing in this full res mesh to start. As you can see in the drop-down Meshlab supports many different 3D formats. Now depending on the file size of your mesh it may take a moment to load. Let’s try and rotate this model in the viewport with left mouse button drag. I can see that we’re only getting a few frames per second.
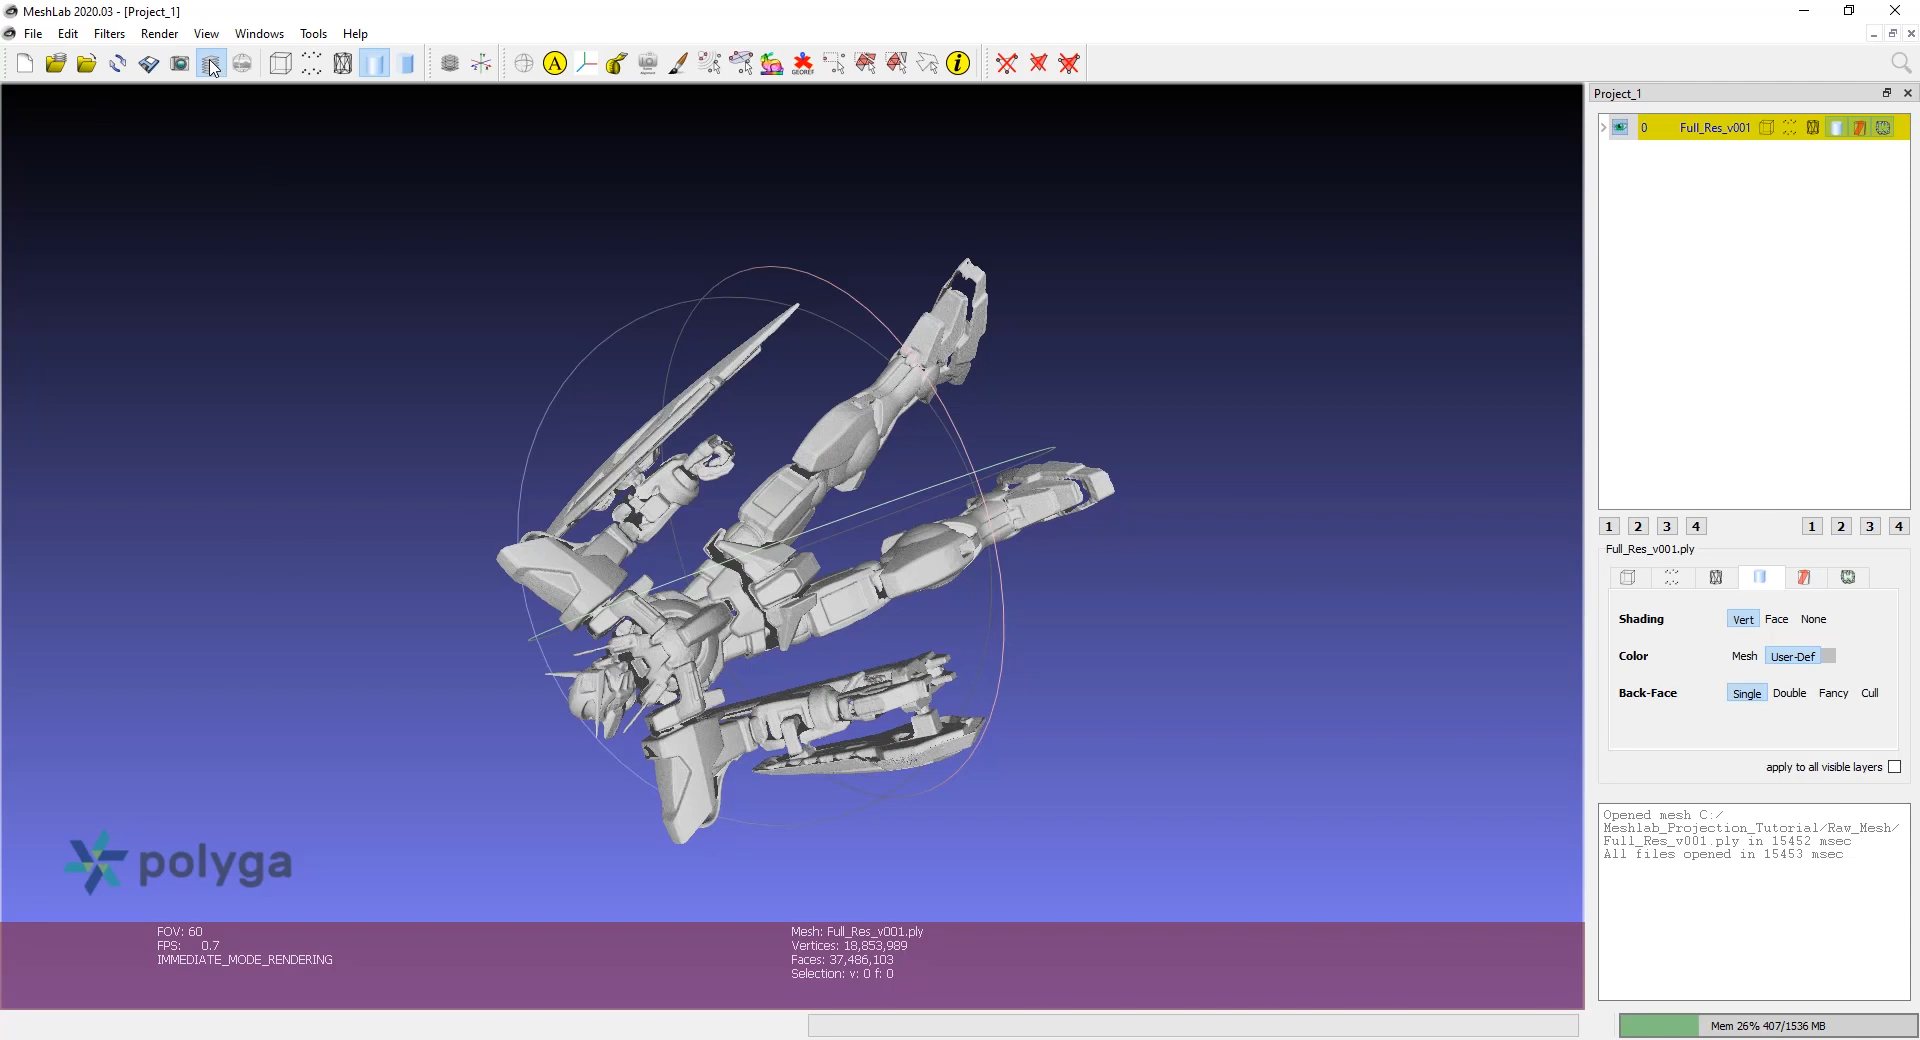
At the bottom of the screen we can see this model has over 18 million vertices and 37 million faces.
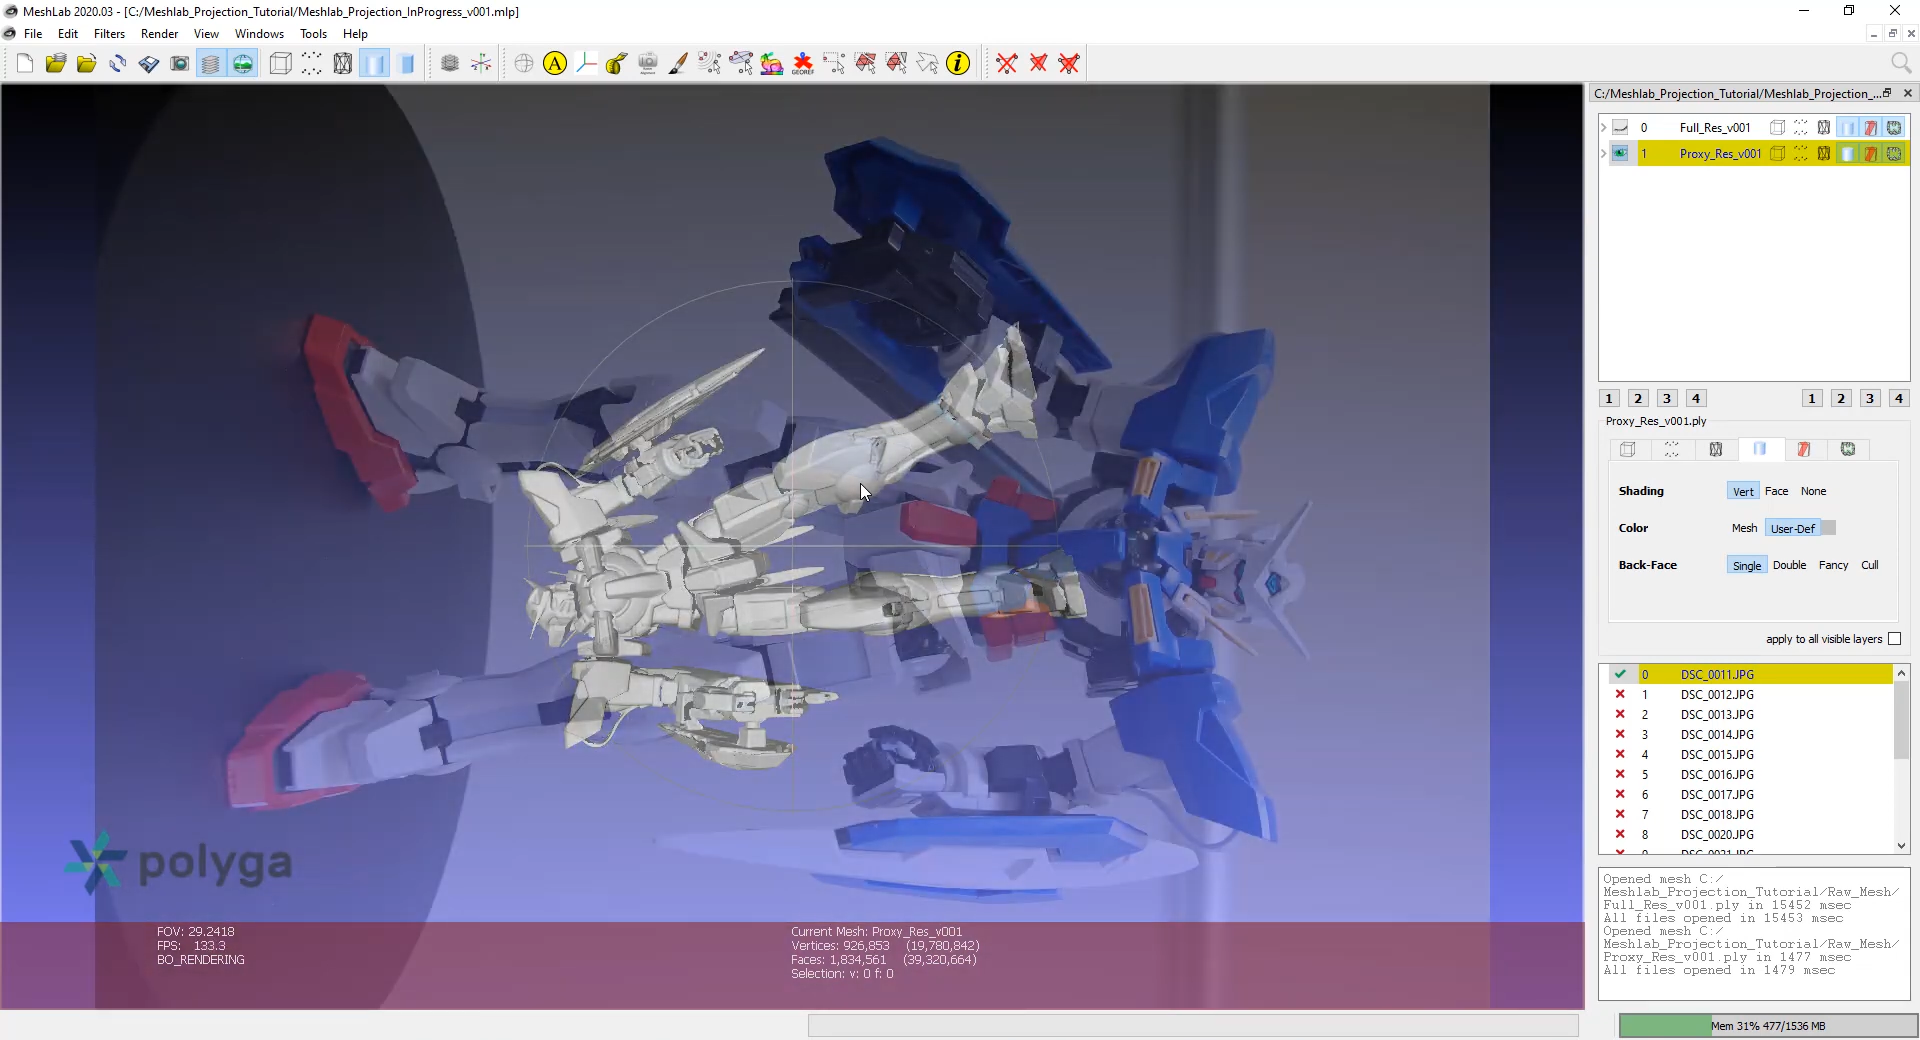
The layer panel we see on the right side of the screen can be toggled on and off using its icon on the tool shelf. Visibility of each mesh can be controlled by clicking on this eye icon. Let’s hide our full res mesh for now.
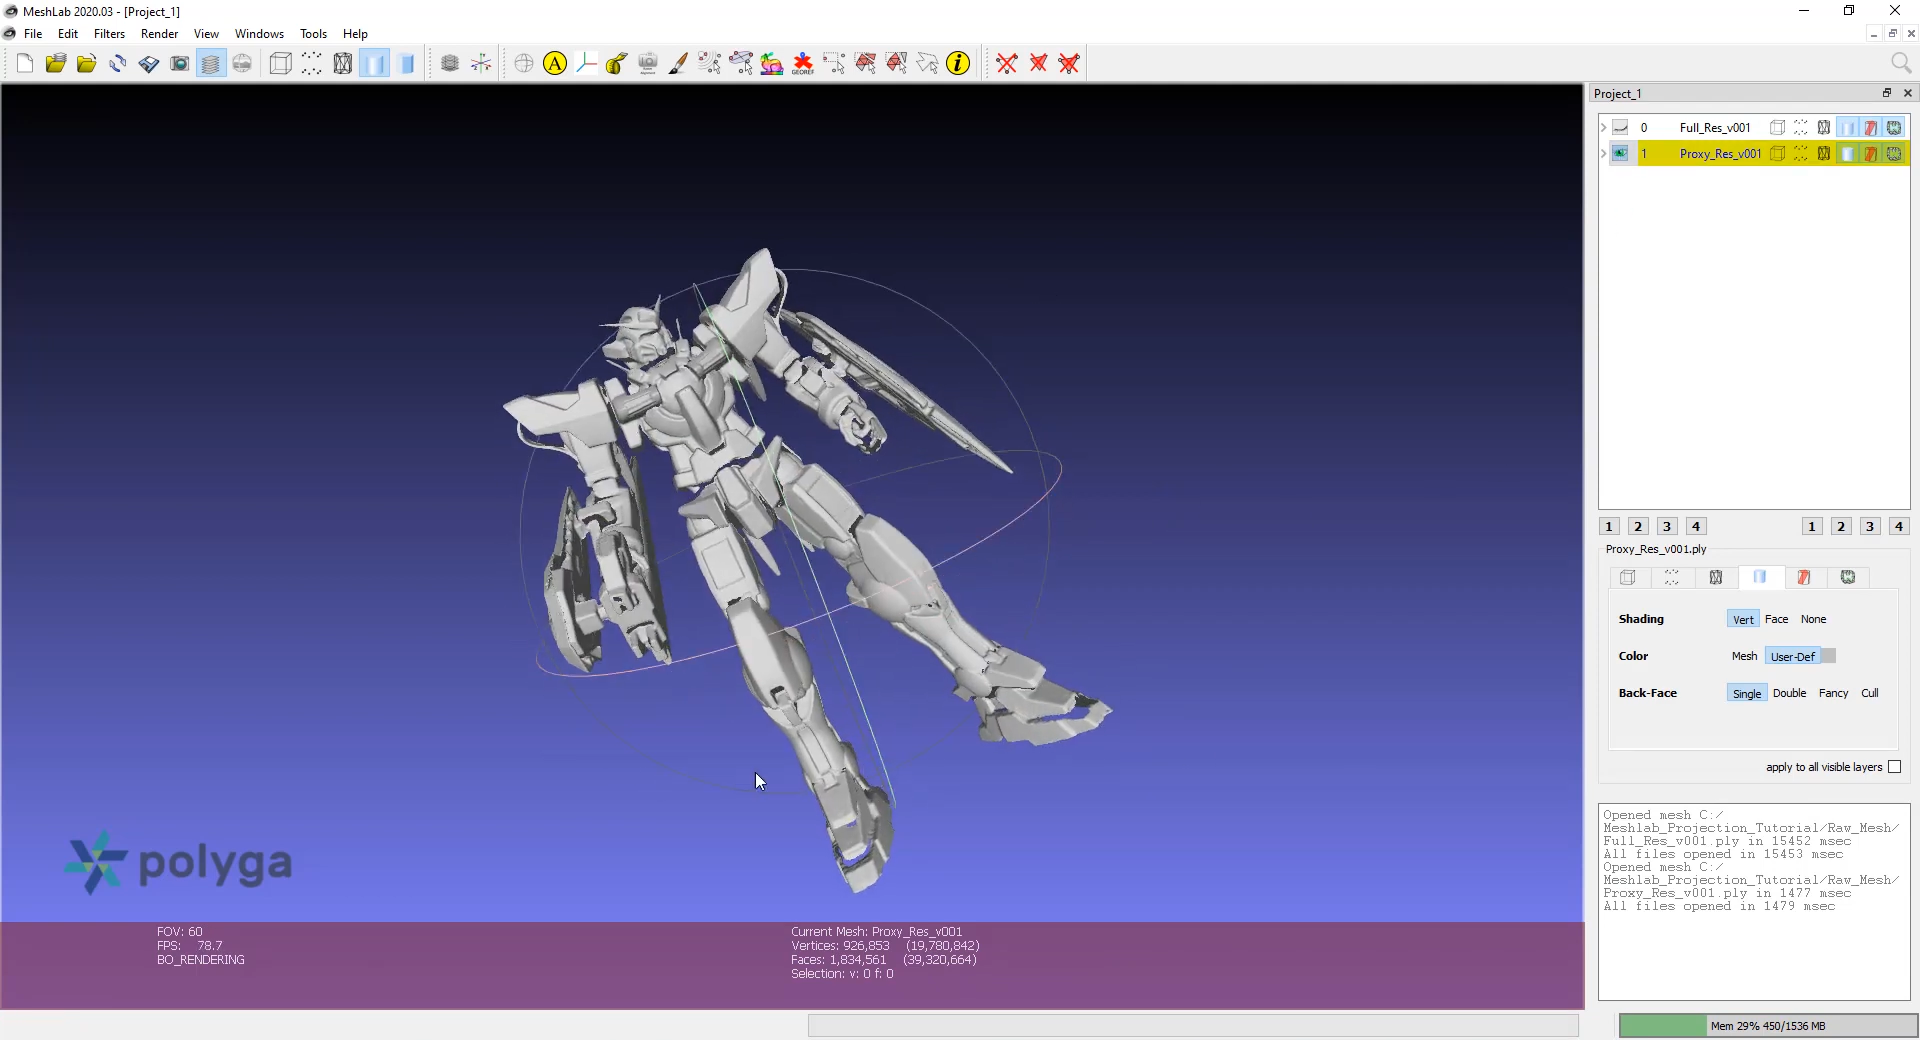
Back in the file dialog use import mesh and we’ll also be bringing in a proxy version of our mesh. We can see we’ve dropped down to about 900,000 vertices. With only our proxy mesh visible we’re getting 60 frames per second when I rotate the viewport which will help us line up our projections.
Let’s open Meshlab’s quick help feature from the help menu so we can learn how to control the camera. Notice in the list we can see alt drag for Z panning.
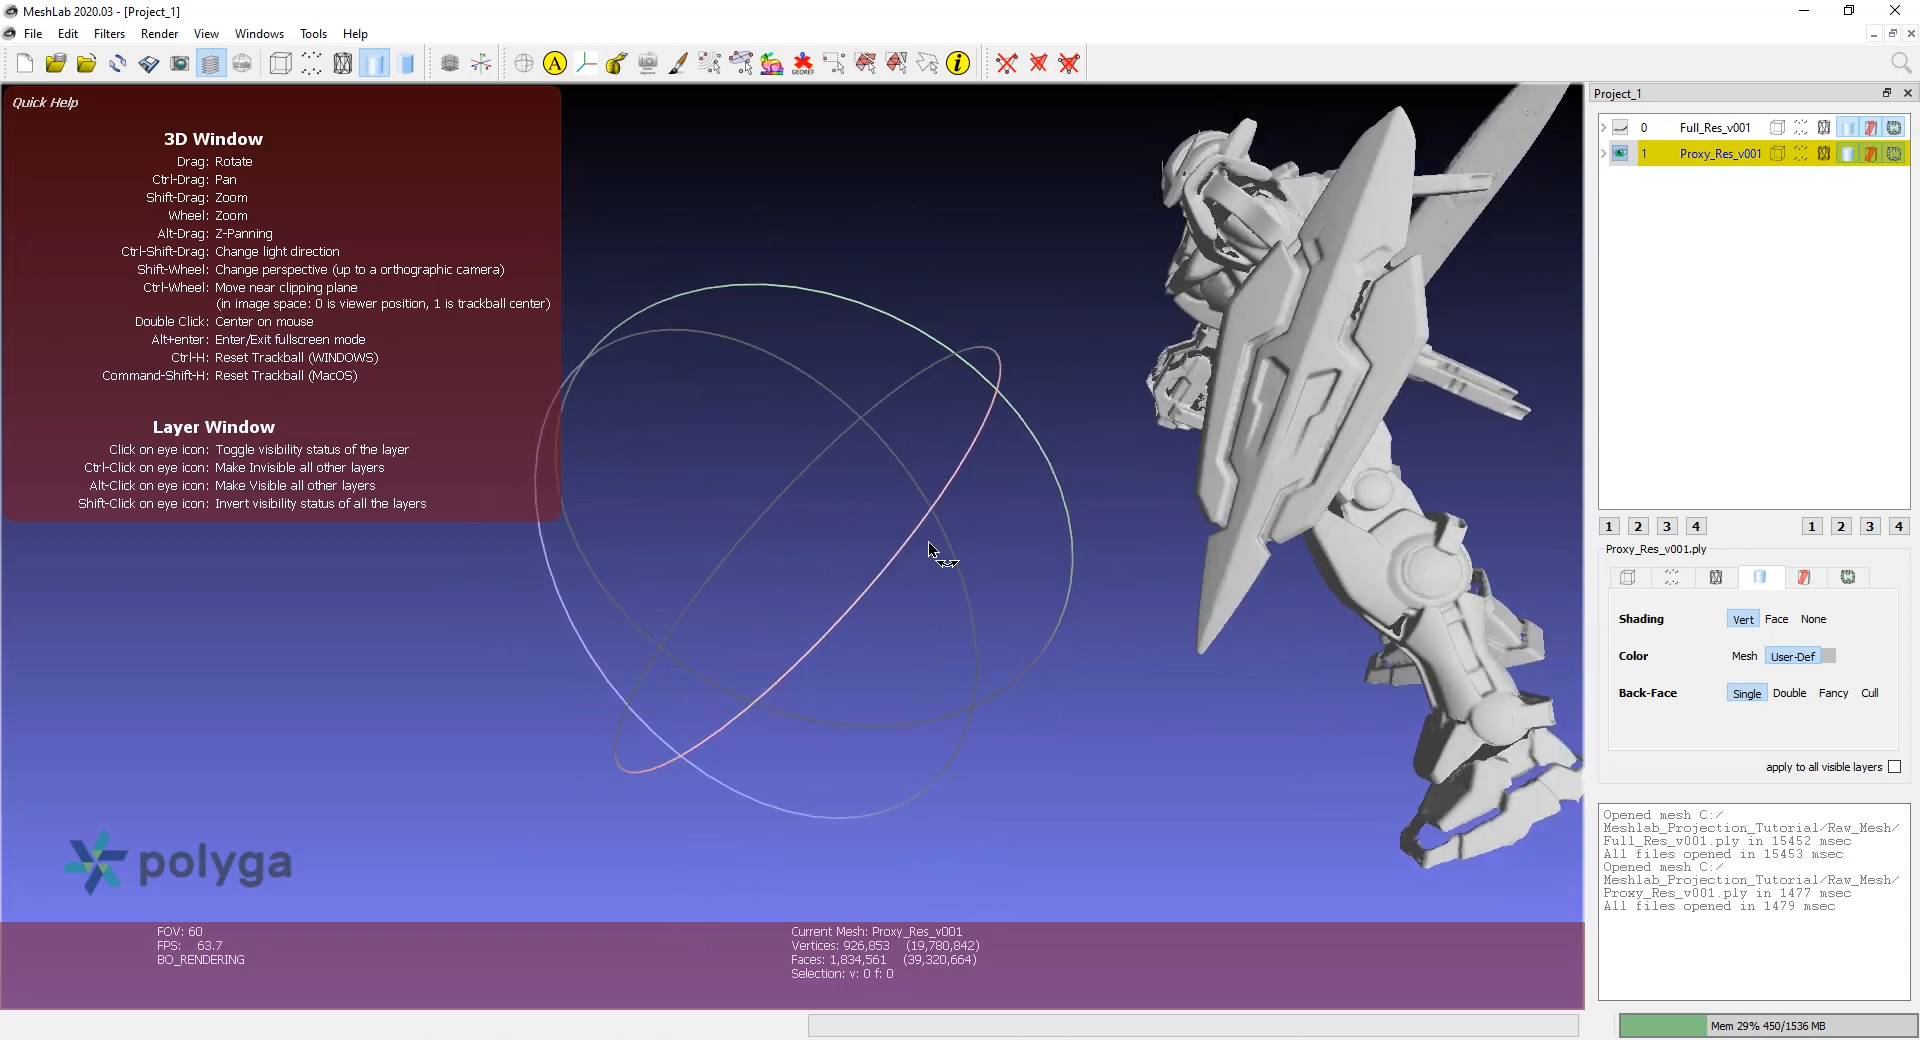
I recommend avoiding this control as it changes the camera rotation center away from the model. Let me demonstrate.
We’ll just use ctrl-h to reset the camera and we get our center back. Instead let’s use shift drag to zoom. This mode will not change the center of rotation. To change the field of view we hold down shift while using the mouse wheel. Let’s try that now. This will be essential for aligning our camera projections with our photographs. The current field of view is shown as FOV in the bottom left corner. I’m going to turn off the quick help from the help menu for now. It’s a good time to save our project file. Don’t forget to save often and feel free to version up, Meshlab scene files are very compact. Next I’m going to import all of the photos of the model you saw at the start of this video.
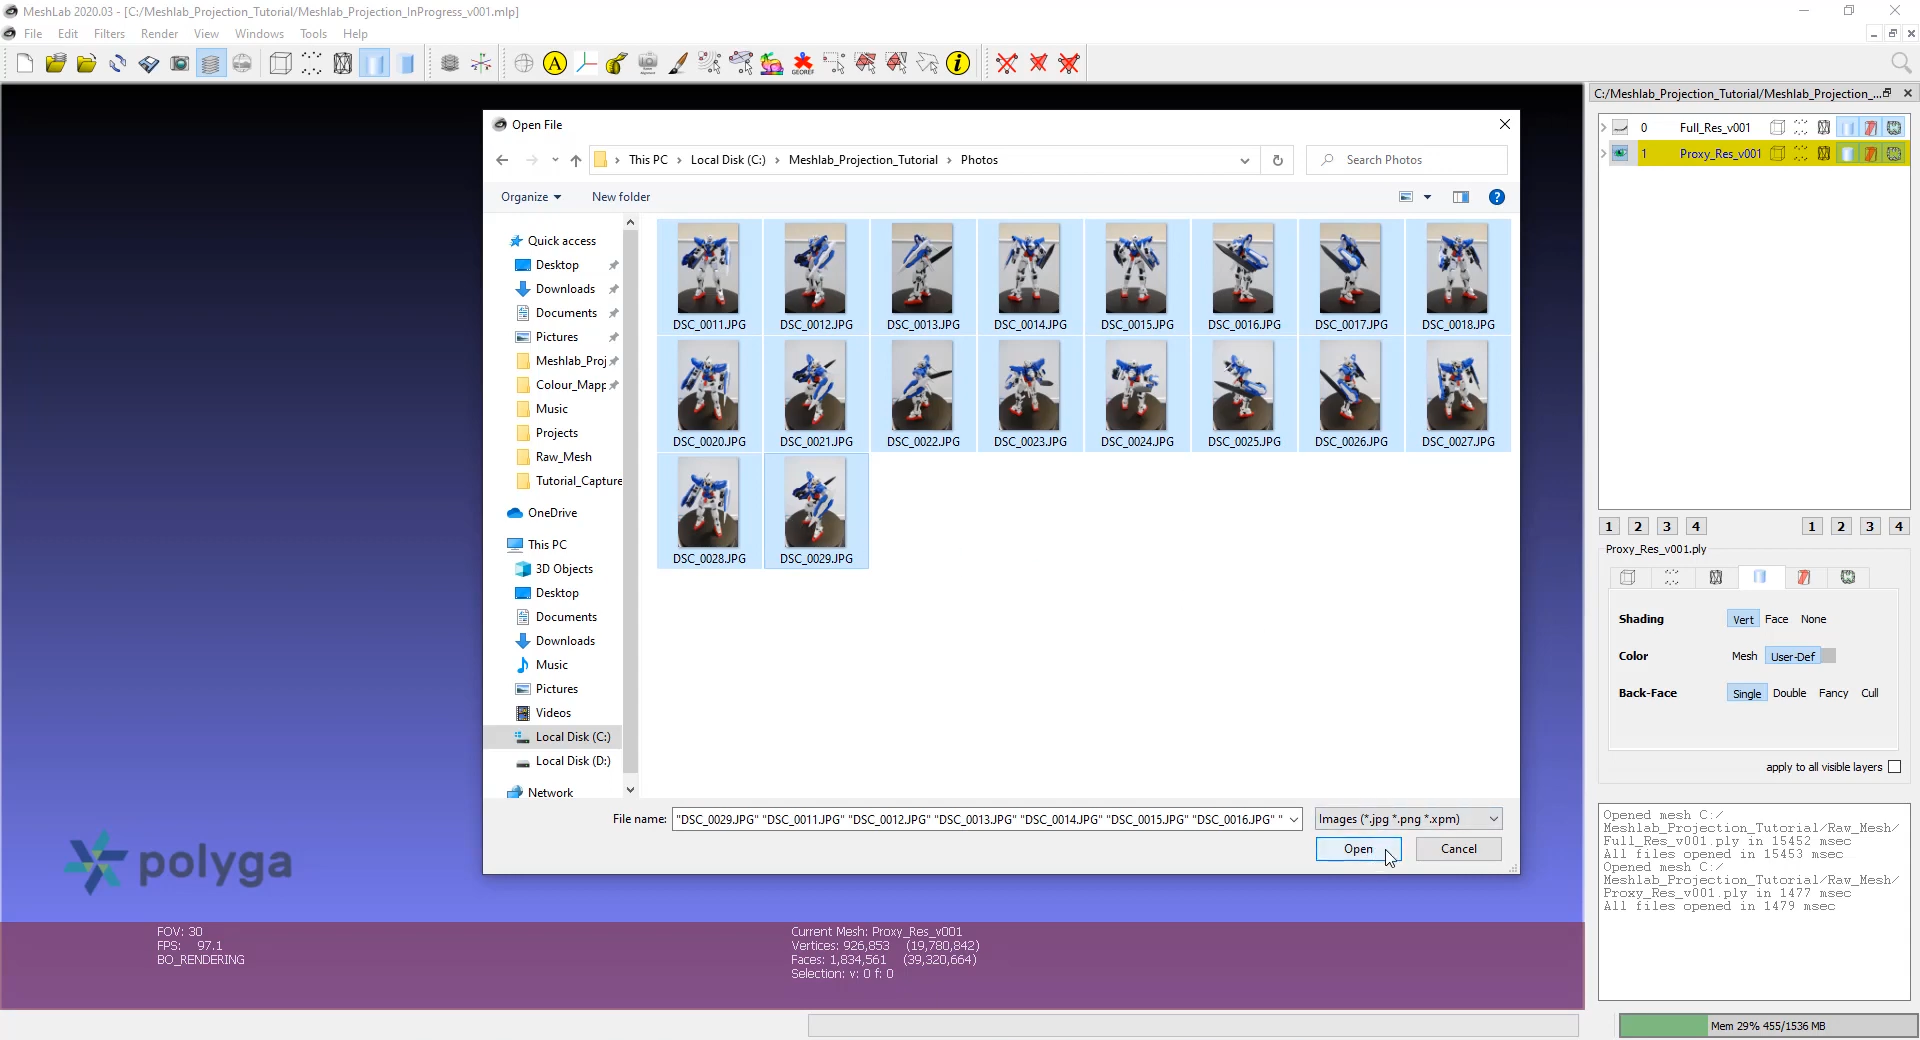
From the file menu select file > import raster. Find and select all of your photos and click open.
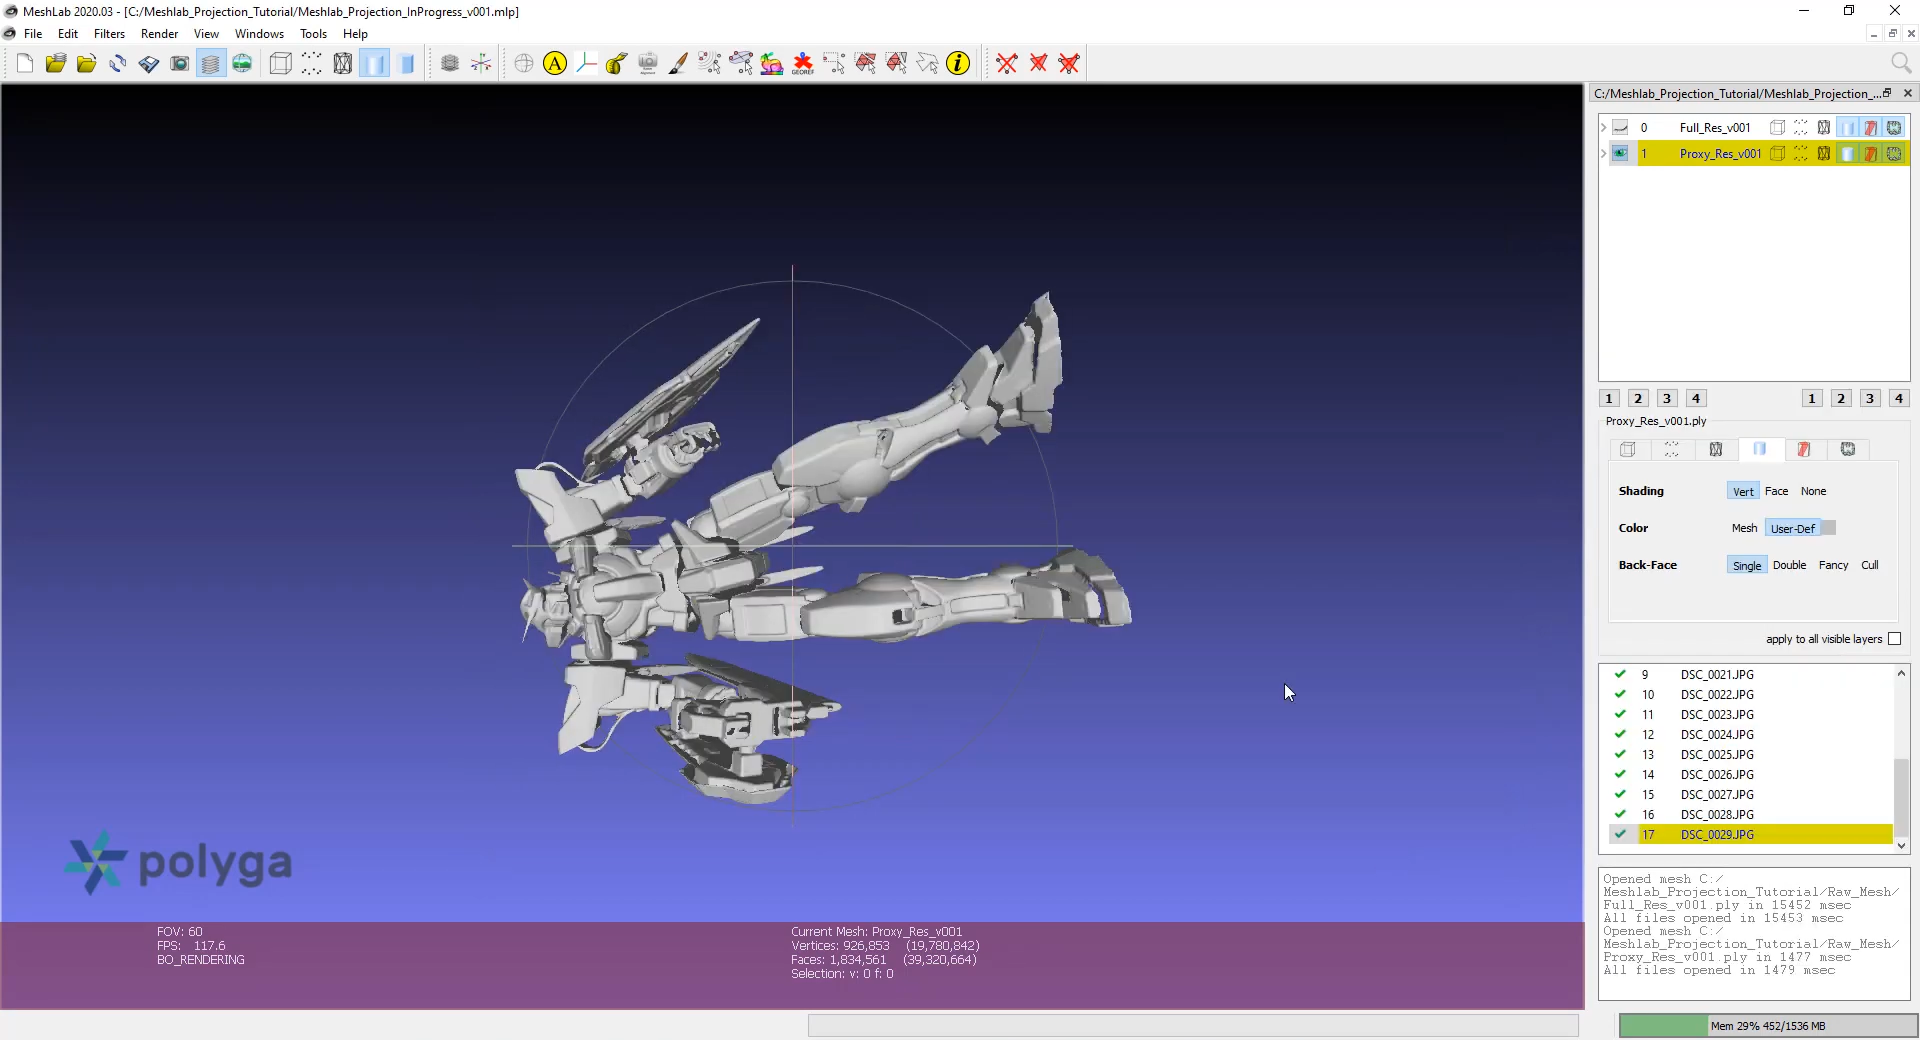
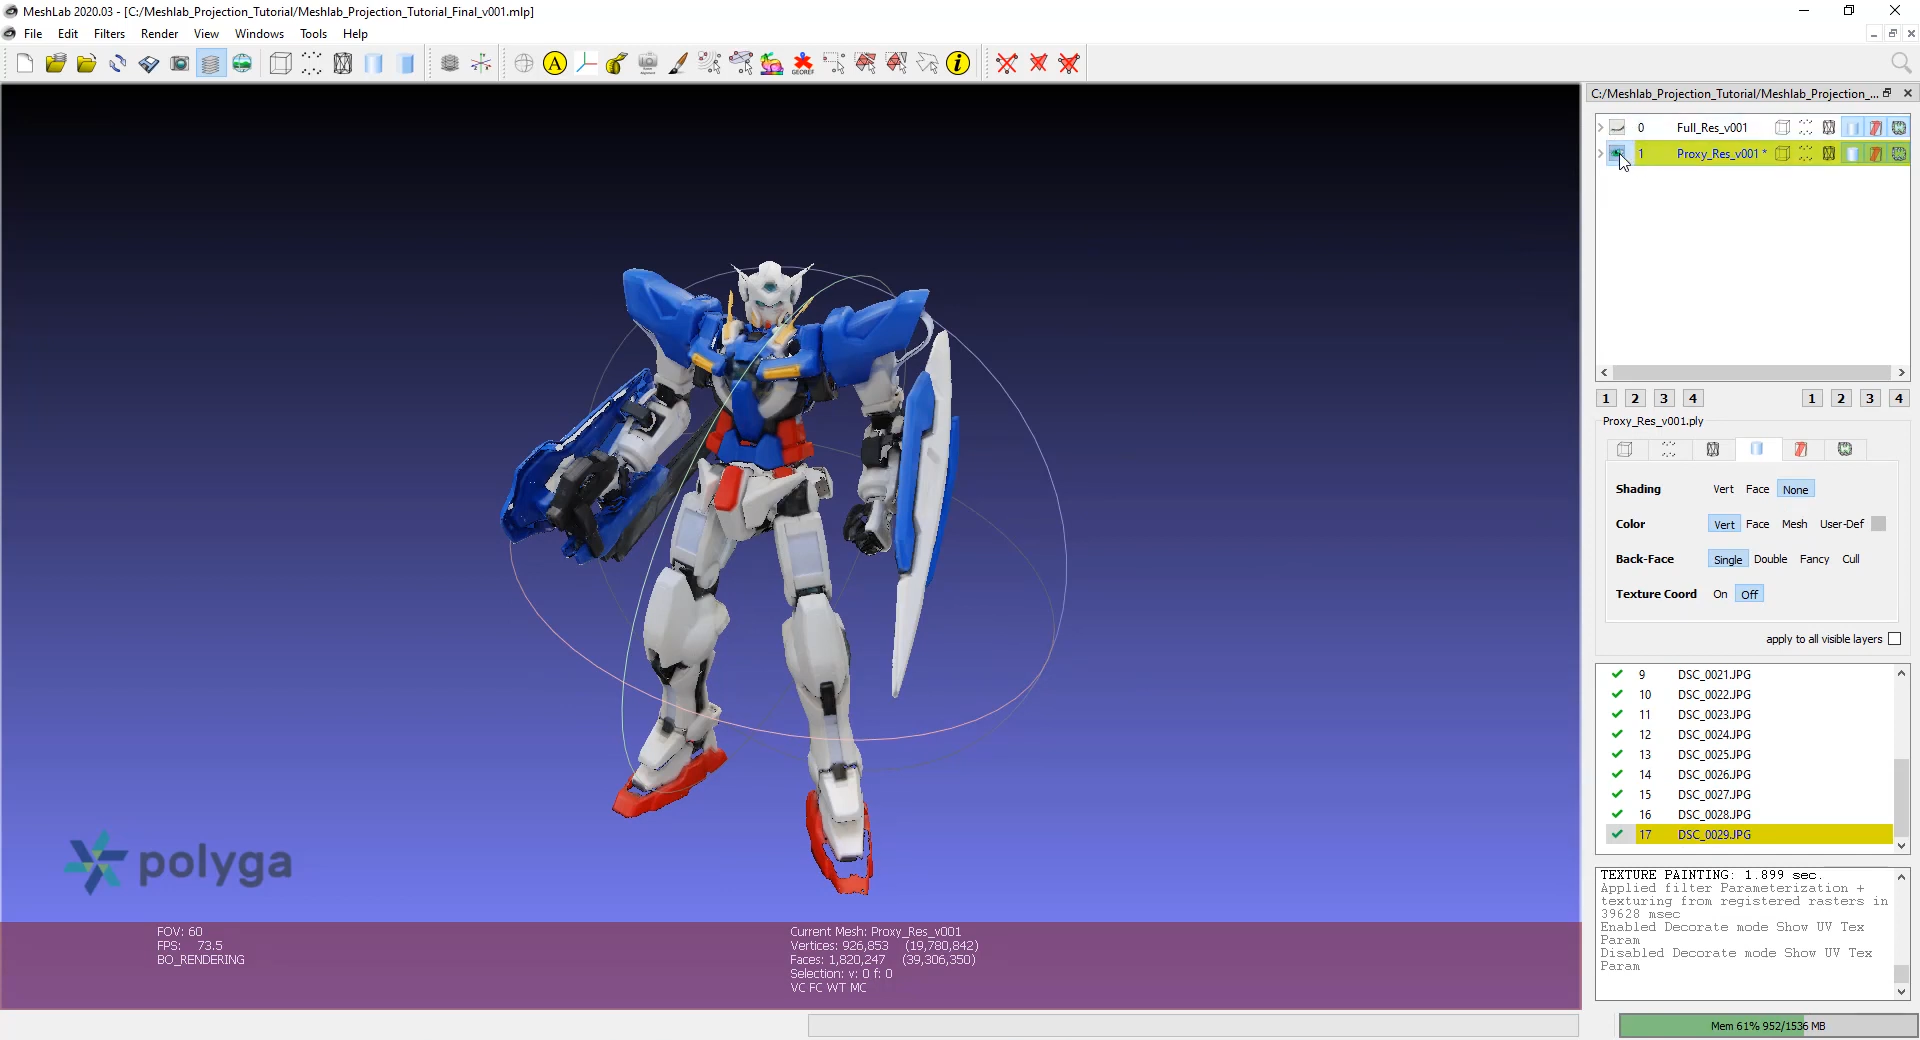
Once the photos have been imported they will be listed as raster’s in the layer dialog on the right. The green check mark to the left of each photo means this projection is active.

Left click on each checkmark to deactivate each projection except for the top photo. We’re doing this so we can see the effect of each projection only when we’re done lining it up.
With our top photos selected click on the show current raster mode button on the toolbar to enter raster mode. Using the mouse wheel we can control the transparency of the photo overlaying our model. In raster mode we rotate pan and zoom the camera to get the line above the model close to the photograph.
If things don’t seem to be lining up try changing the field of view by holding shift while spinning the mouse wheel. The lineup doesn’t have to be perfect as Meshlab will try to snap the view into place.
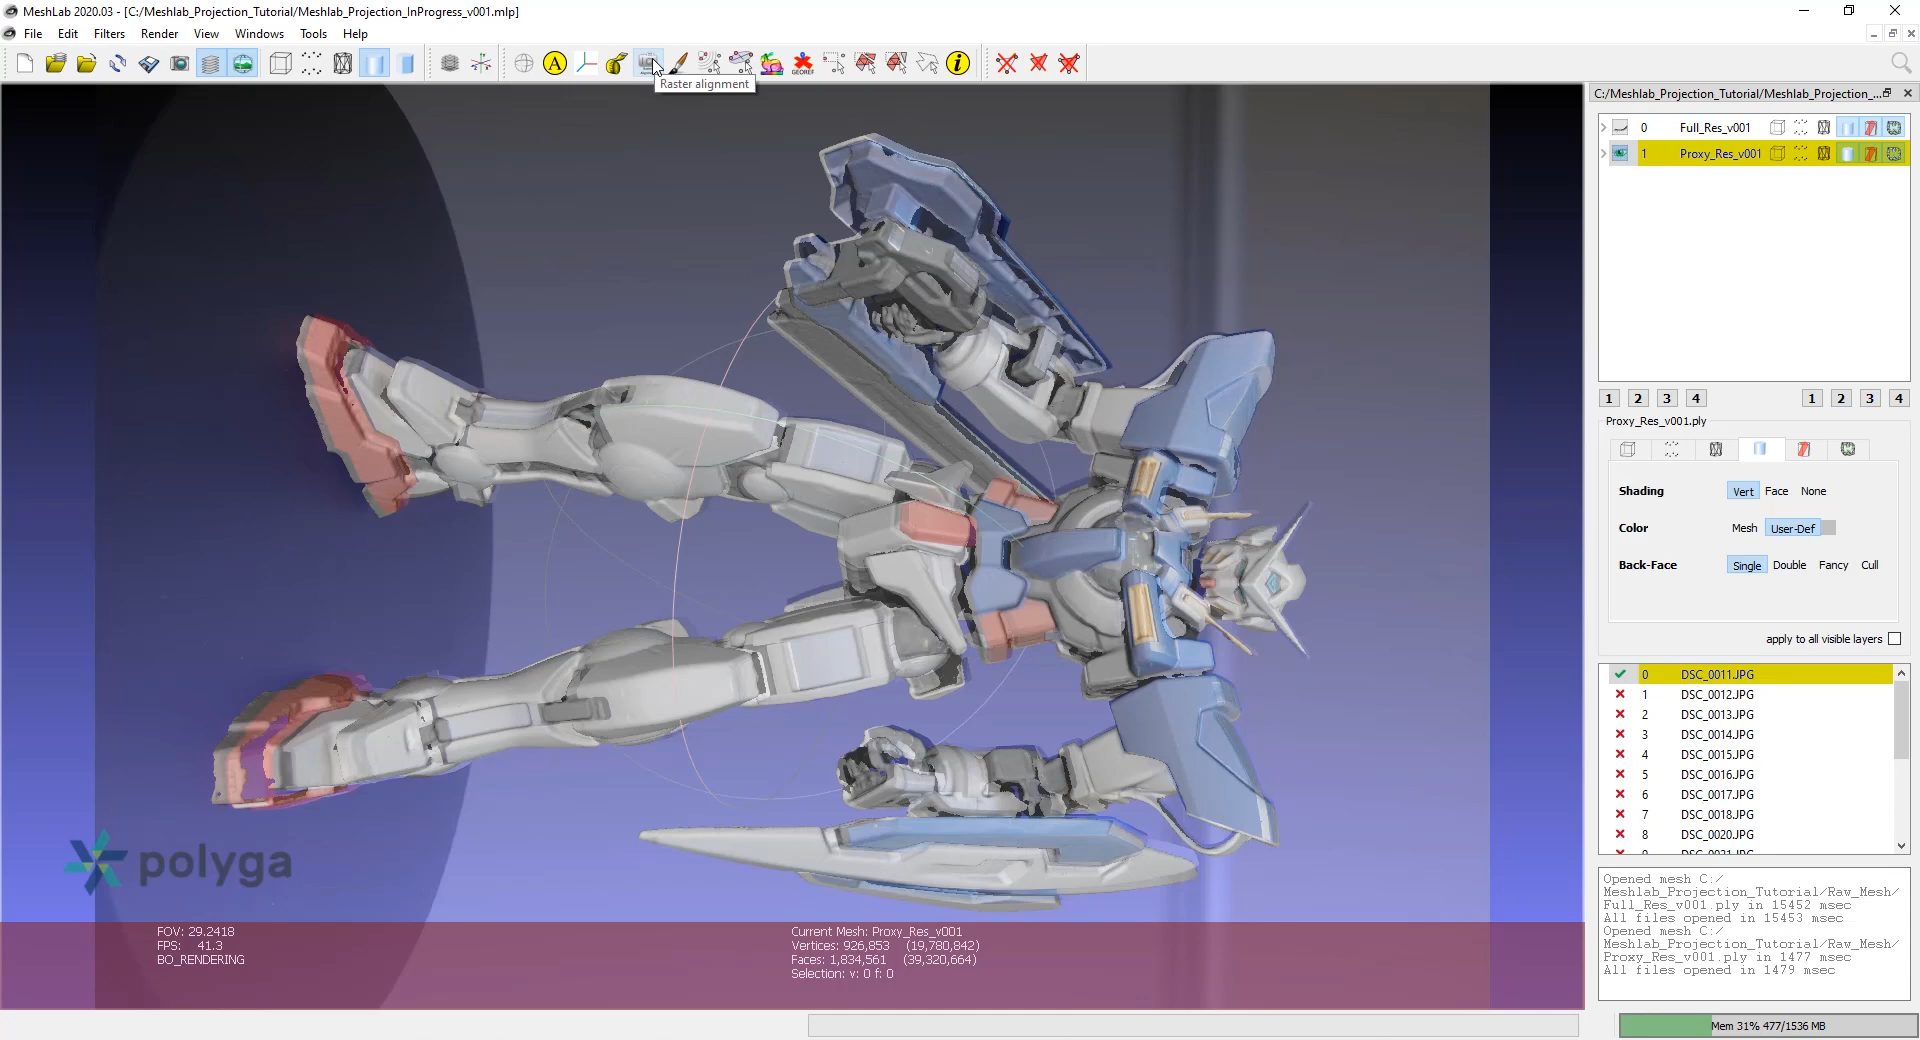
Next click on the raster alignment button on the toolbar.
If you are unsure of the field of view in your lineup, try enabling optimized focal. If you’d like Meshlab to try even harder to snap the projection, increase the number of iterations above the default of 200.
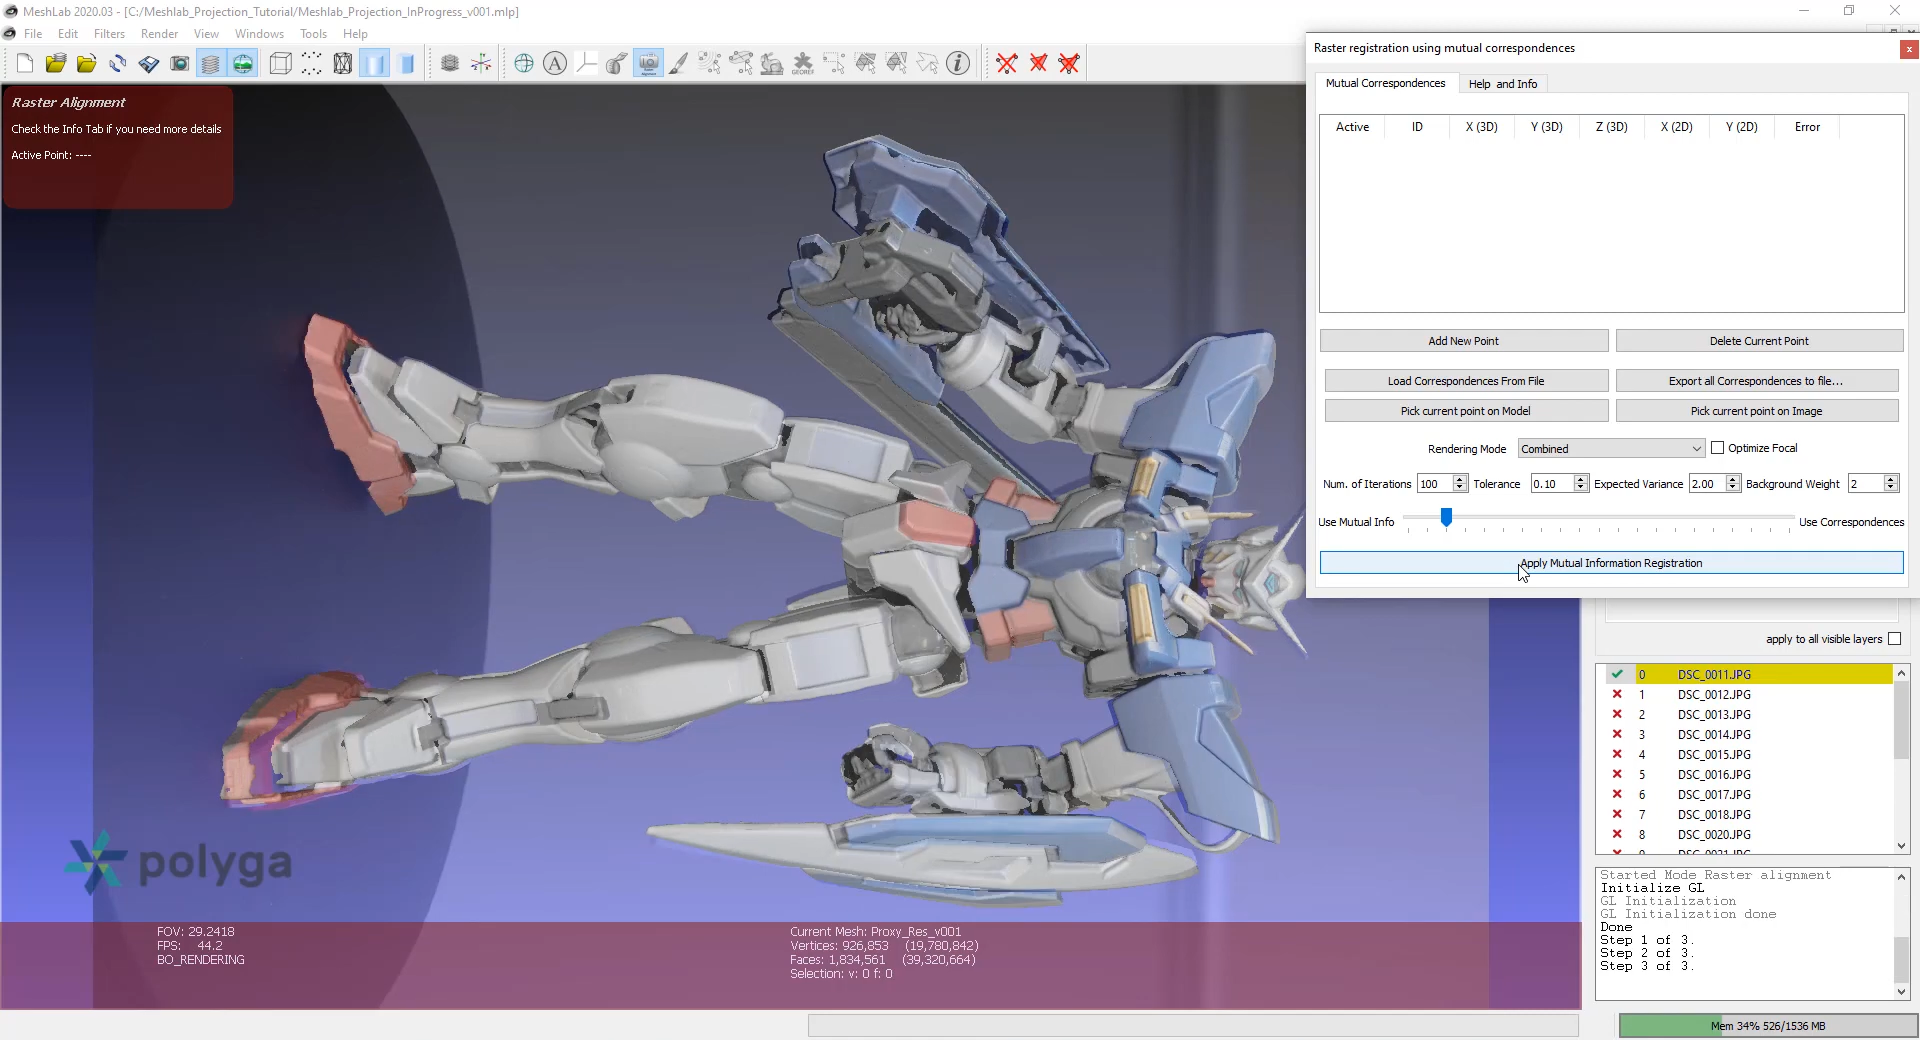
Click the apply mutual information registration for Meshlab to snap the camera projection onto the mesh.
Your alignment is now much closer with the models right arm and leg. Before continuing let’s disable both raster alignment mode and show current raster mode by clicking their icons on the toolbar. Now when we rotate our camera view we won’t accidentally break our first photo’s projection. This is important to understand.
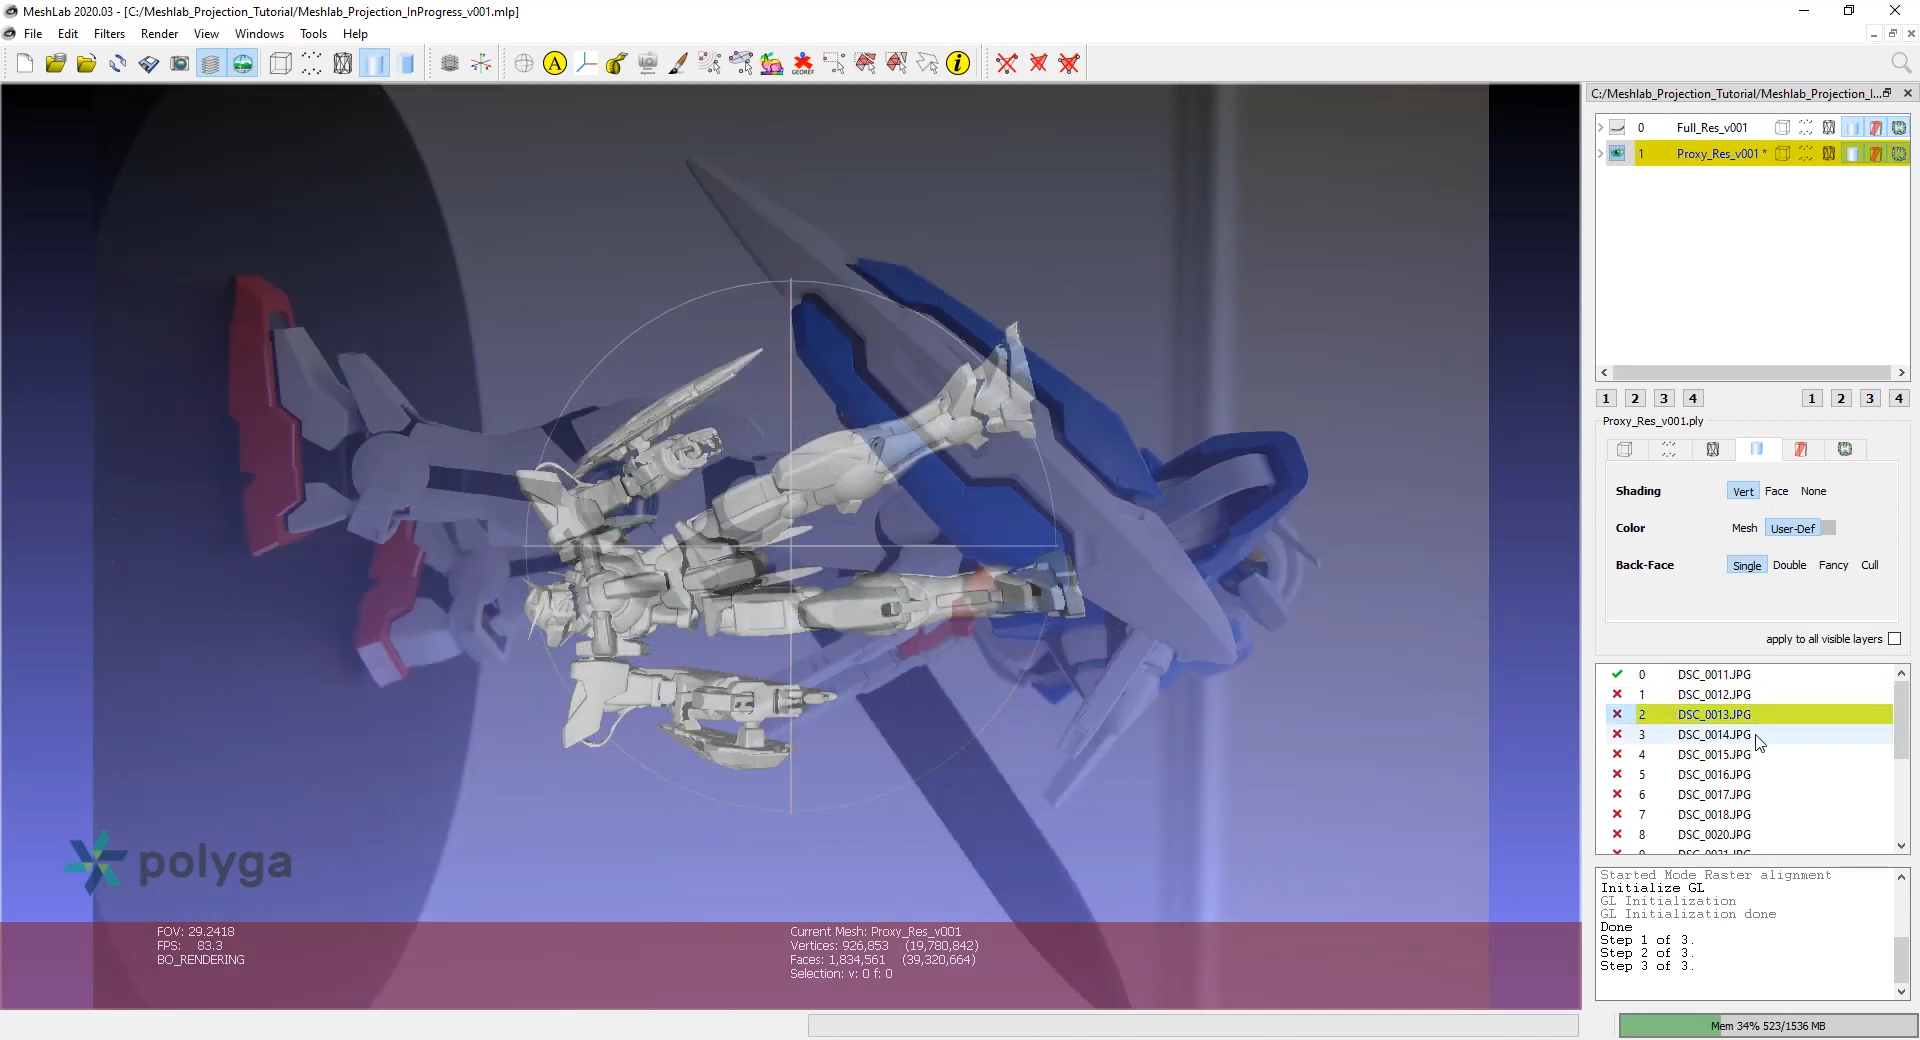
If I temporarily toggle show current raster back on we can see we jump back to our line of projection, and as I click on other photos we can see we haven’t yet done their alignments. Again, toggle off show current raster using the toolbar. This is a good time to save our project.
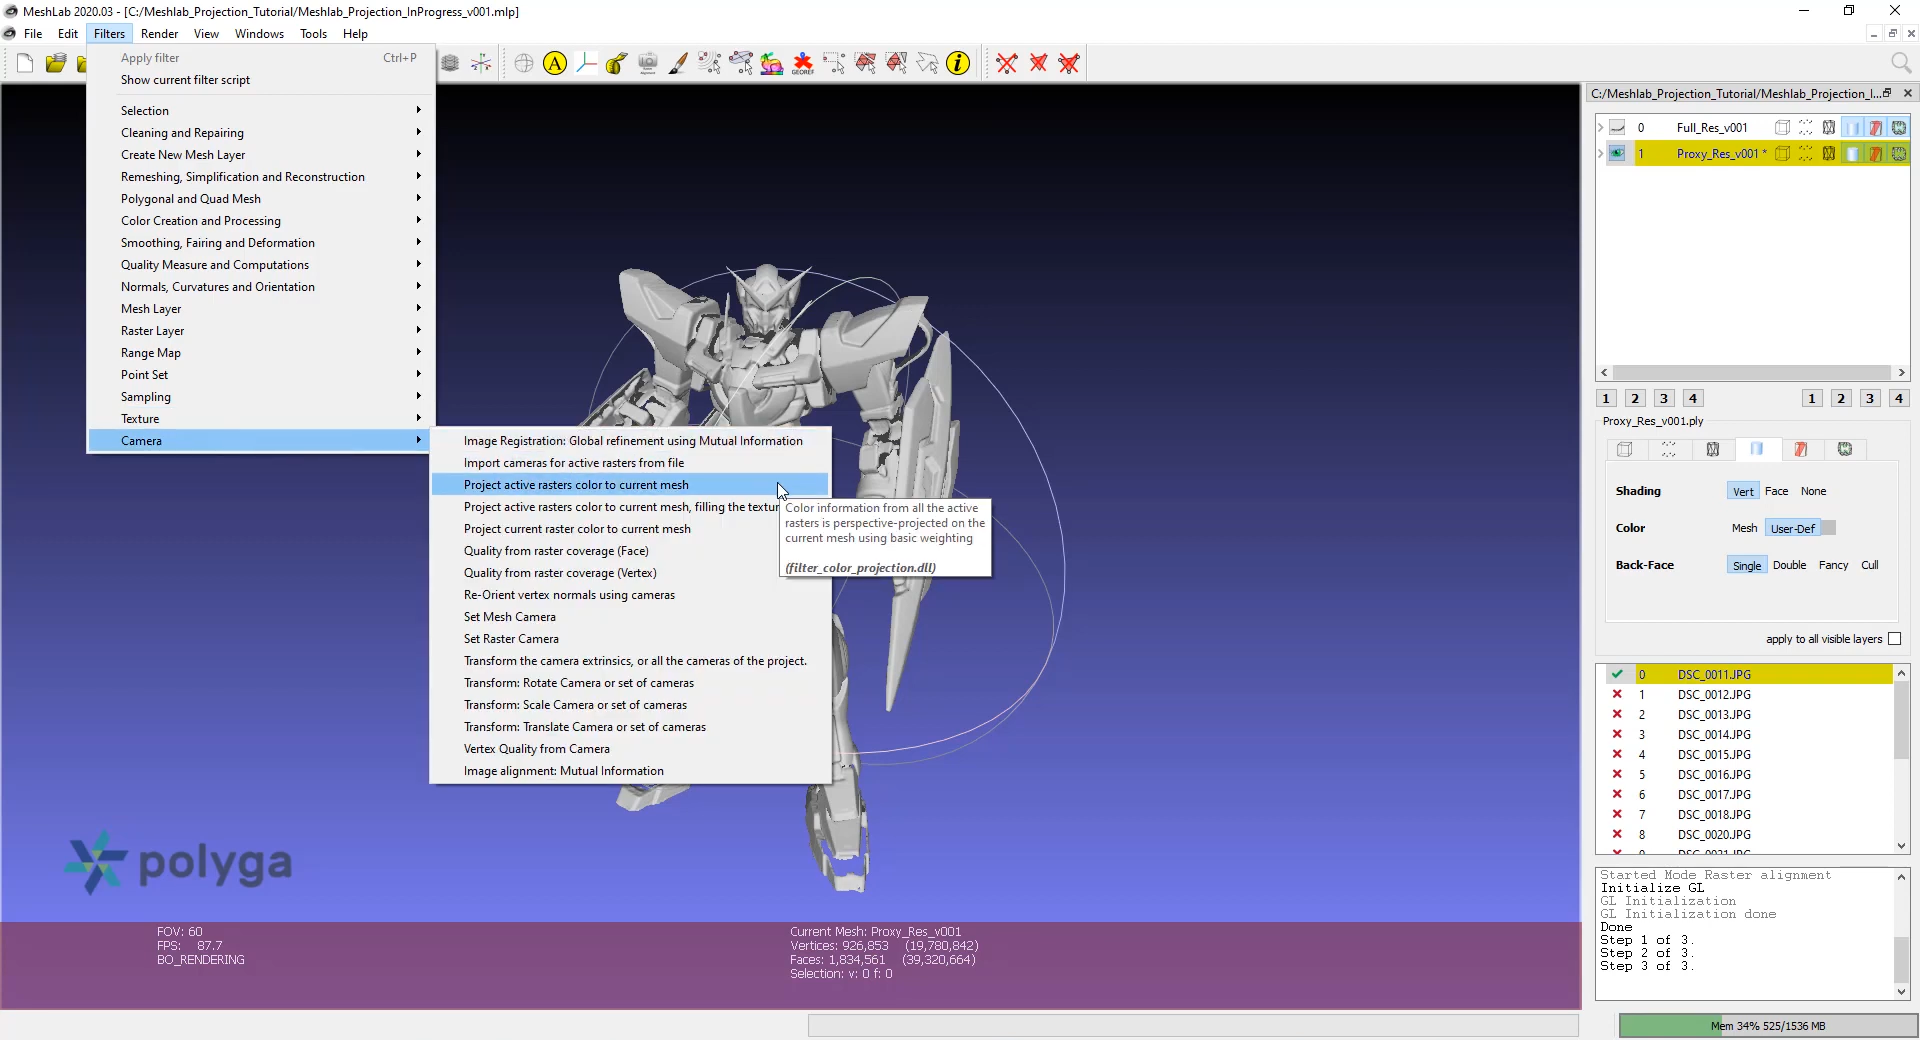
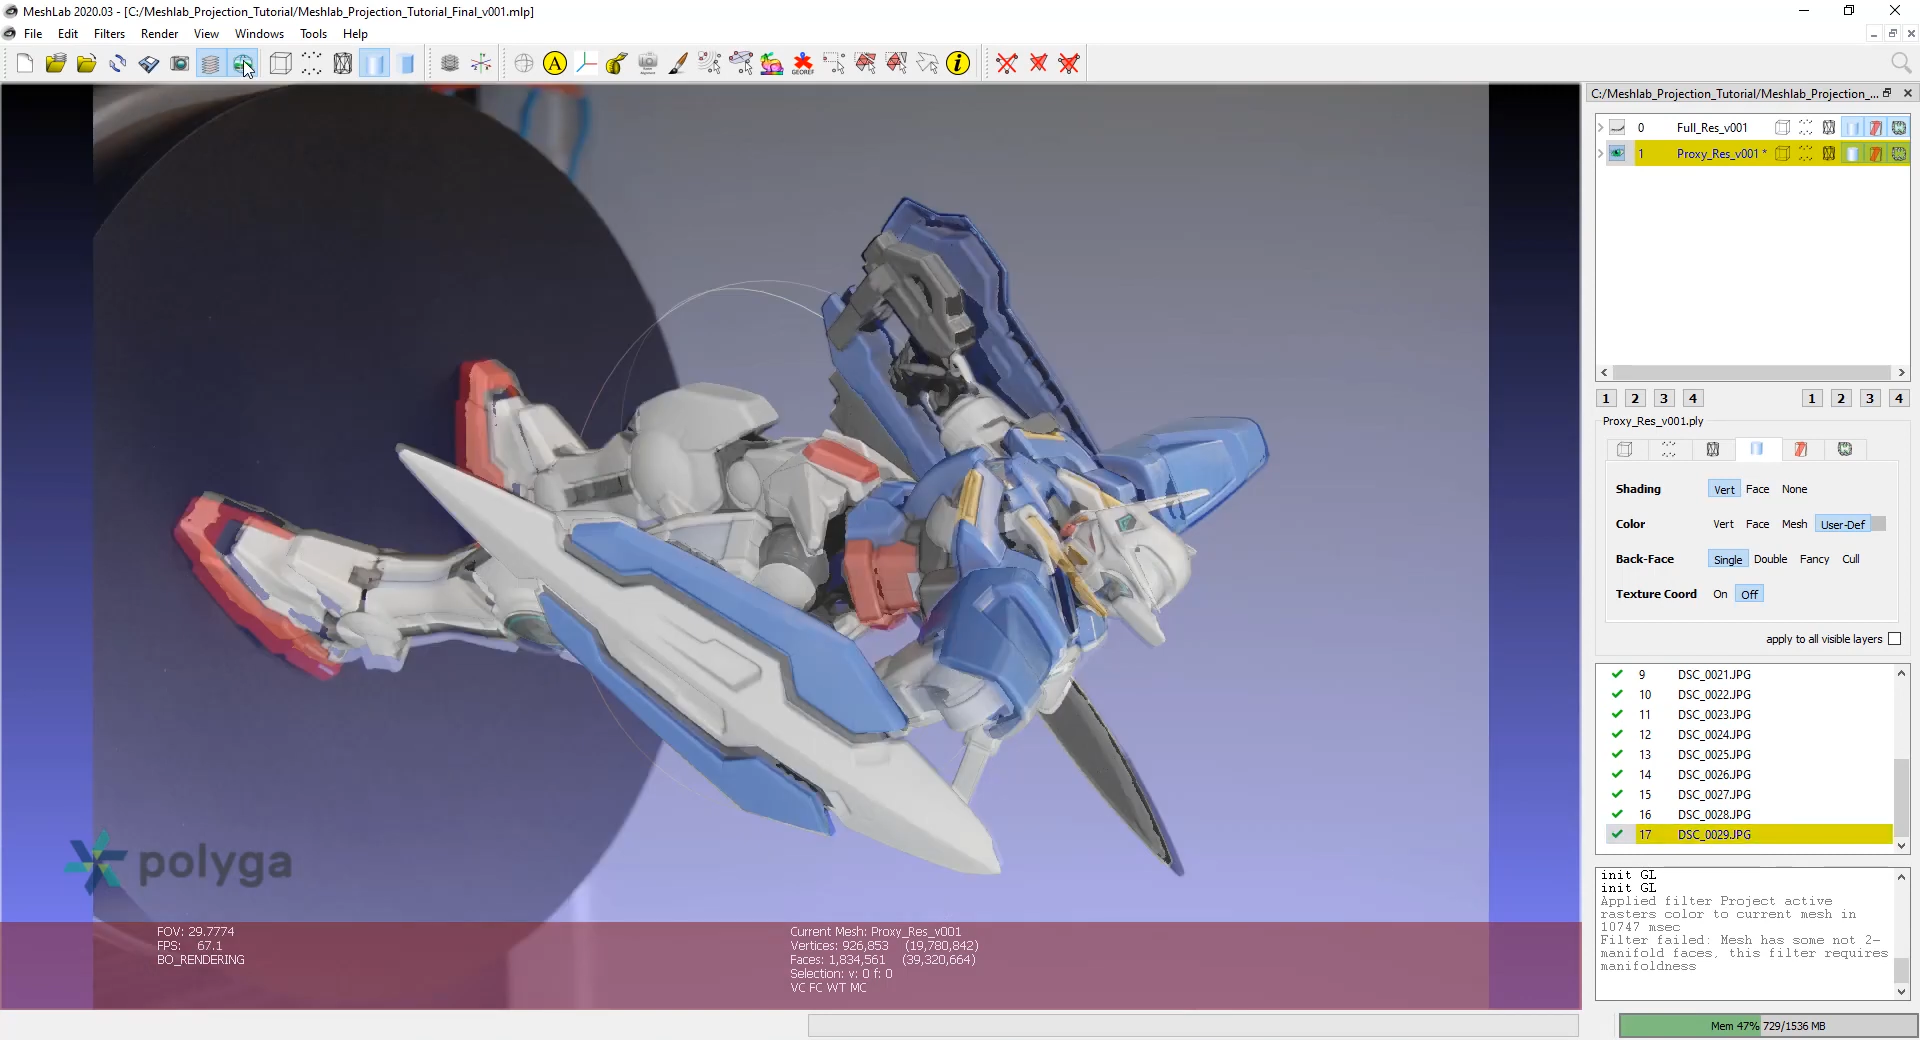
Let’s test projecting our first aligned photo on the object. Go to the filters menu, then camera, and finally project active rasters to current mesh. We’ll stick with the defaults for now. Click apply then close the dialog box when complete.
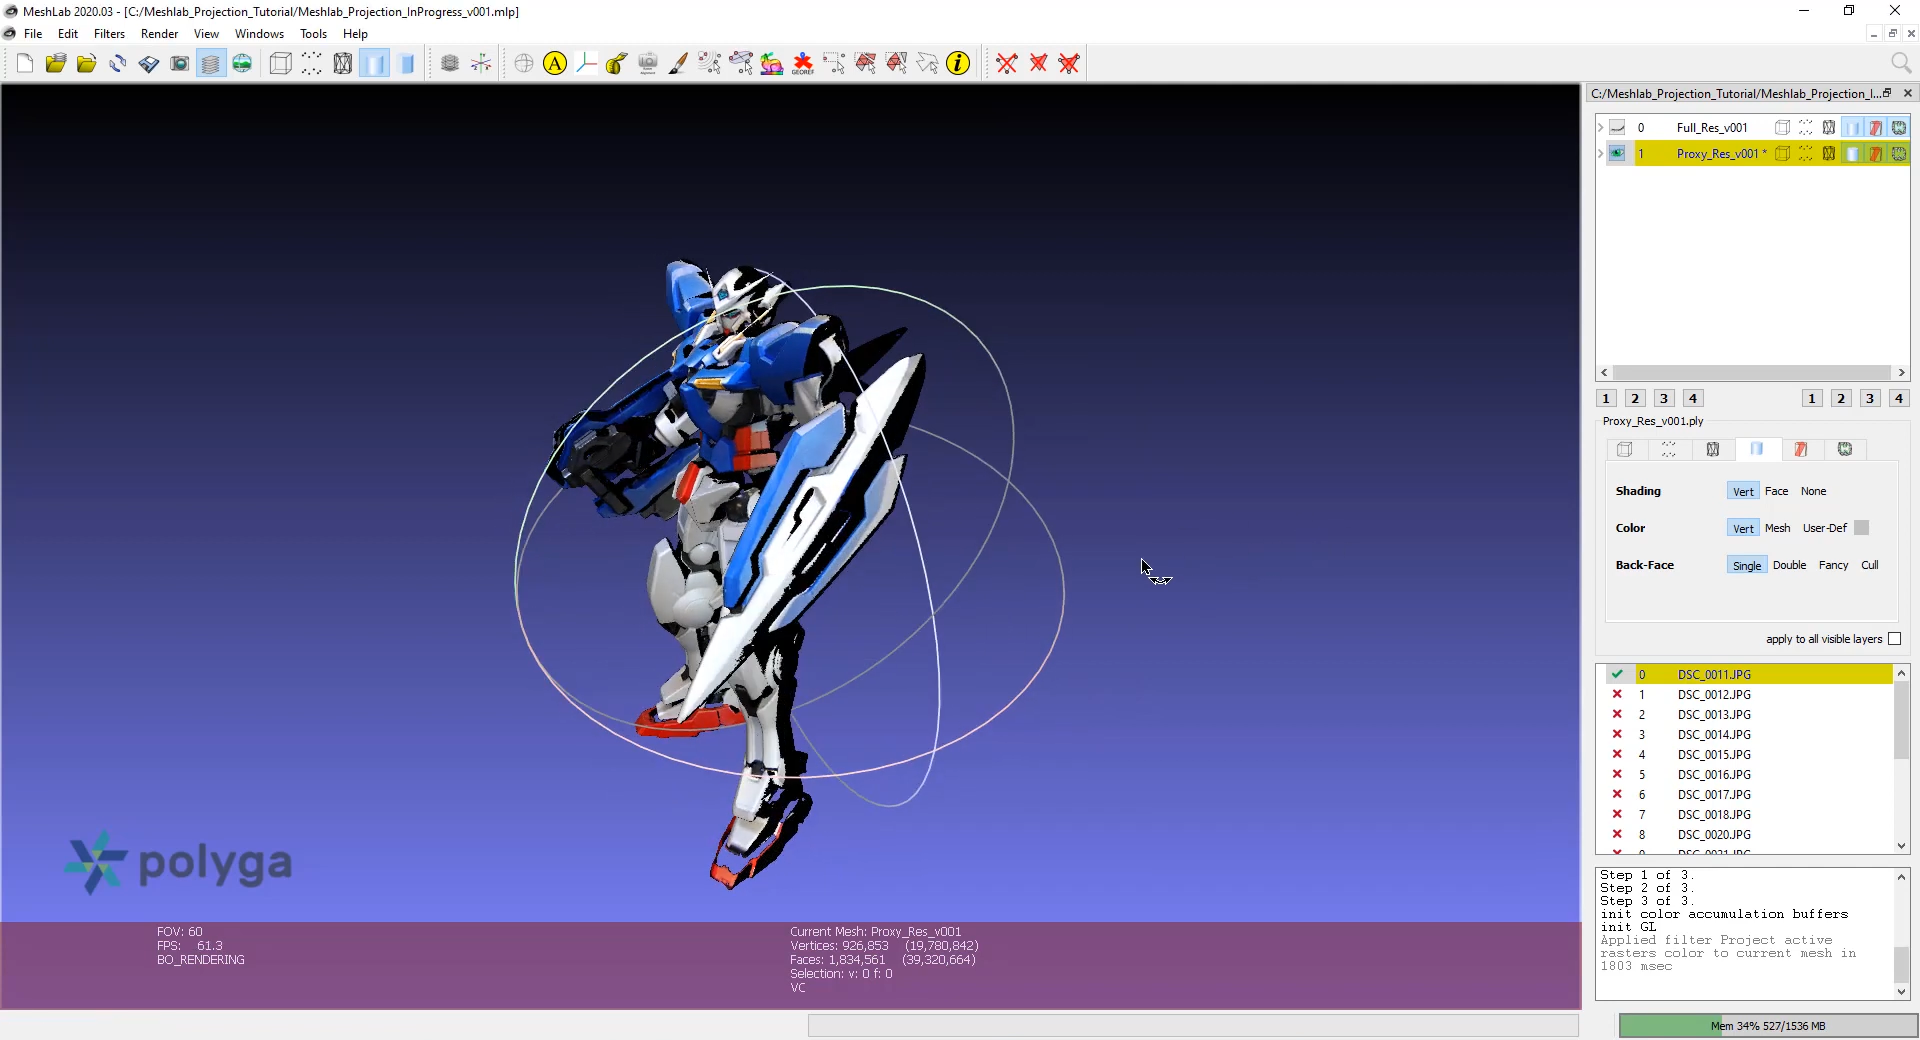
If we rotate the viewport we can see our first projection is being applied to the model as vertex color data. Take note of the options under shading in color in the layer panel. Our models photographs already include shadow information so I’m going to try setting shading to none and color to vertex.
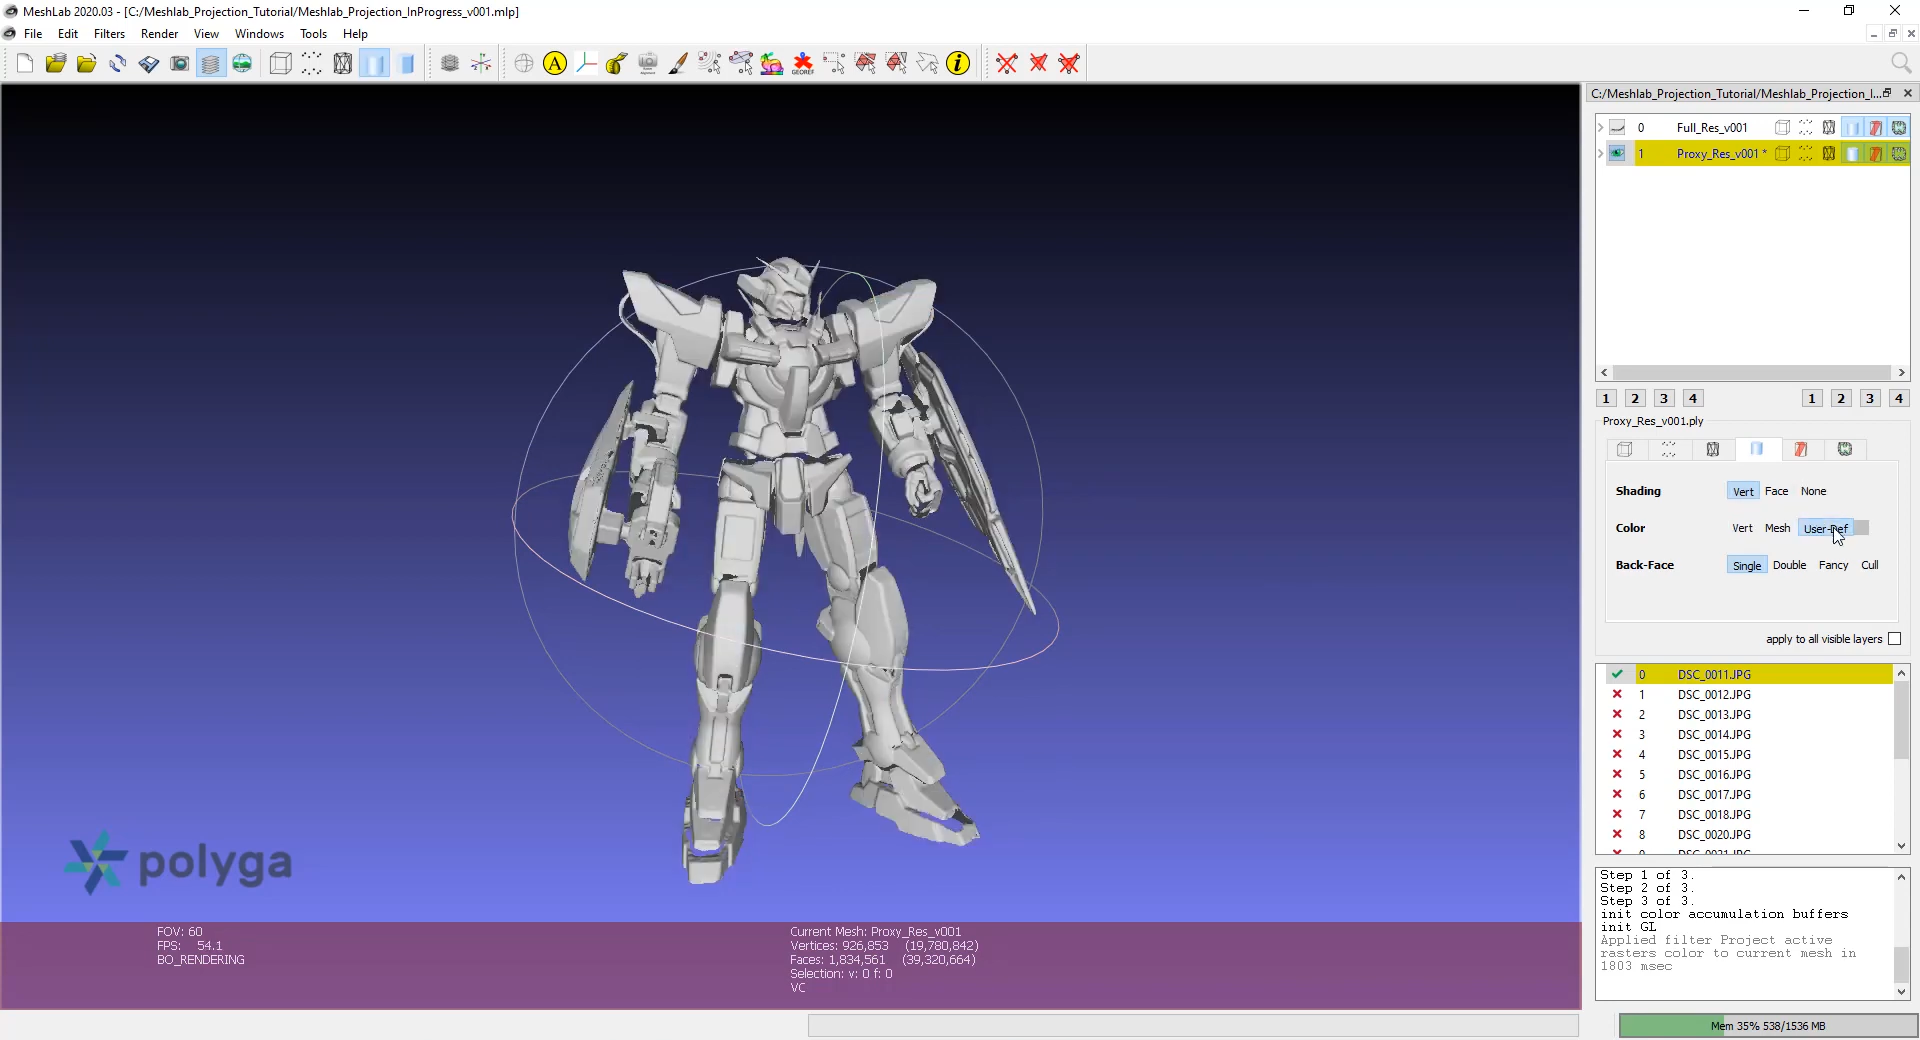
We’re going to quickly align the second photograph so set the shading back to vertex and the preview color back to user-defined.
Make sure the second photo is selected from the list and repeat the process we did for the first photo. Remember the show current raster mode and raster alignment buttons on the toolbar.
As a hint, pay attention to the negative space in your silhouette. I found this really helped me with quickly lining things up. Also if all of your photographs were taken using the same lens, keep that in mind when you find a field of view that works for line up and start from that for each photograph. When you’re happy with the lineup don’t forget to snap the projection using the raster alignment on the toolbar. With our second photo aligned make sure to deactivate show current raster mode from the toolbar.

Make sure the second photo is set to active with a green checkmark in the layer panel. Let’s reproject our colors again with filters > camera > project active raster’s to current mesh.
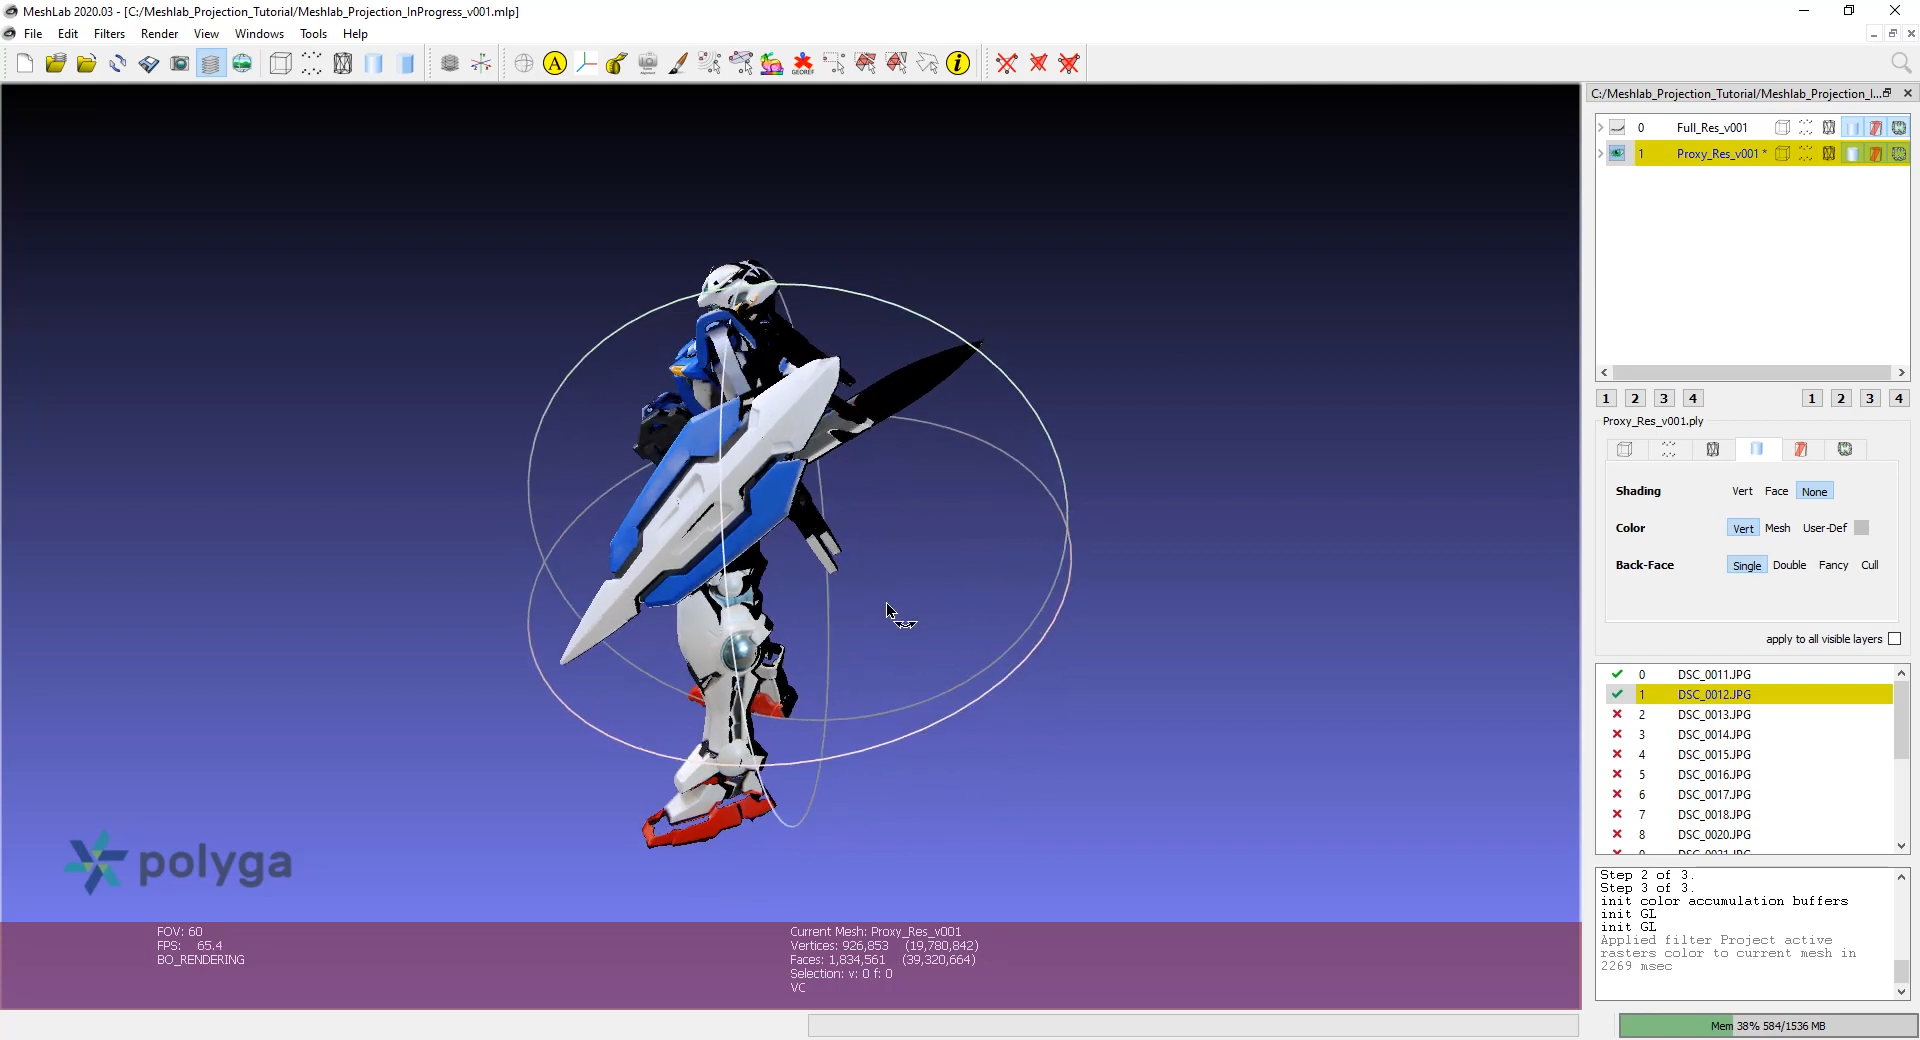
Toggle our shading back to none and we can see our color is mapping over additional areas of the model with no visible seams. We’ll jump forward now to after I’ve aligned the rest of the photos.
On the toolbar I’ll make sure show current raster mode is on, and as you can see as I click through the photos of the layer editor I’ve aligned all of my photos. Let’s reproject our colors again with these new photo alignments. We go to filters > camera > project active rasters to current mesh again.
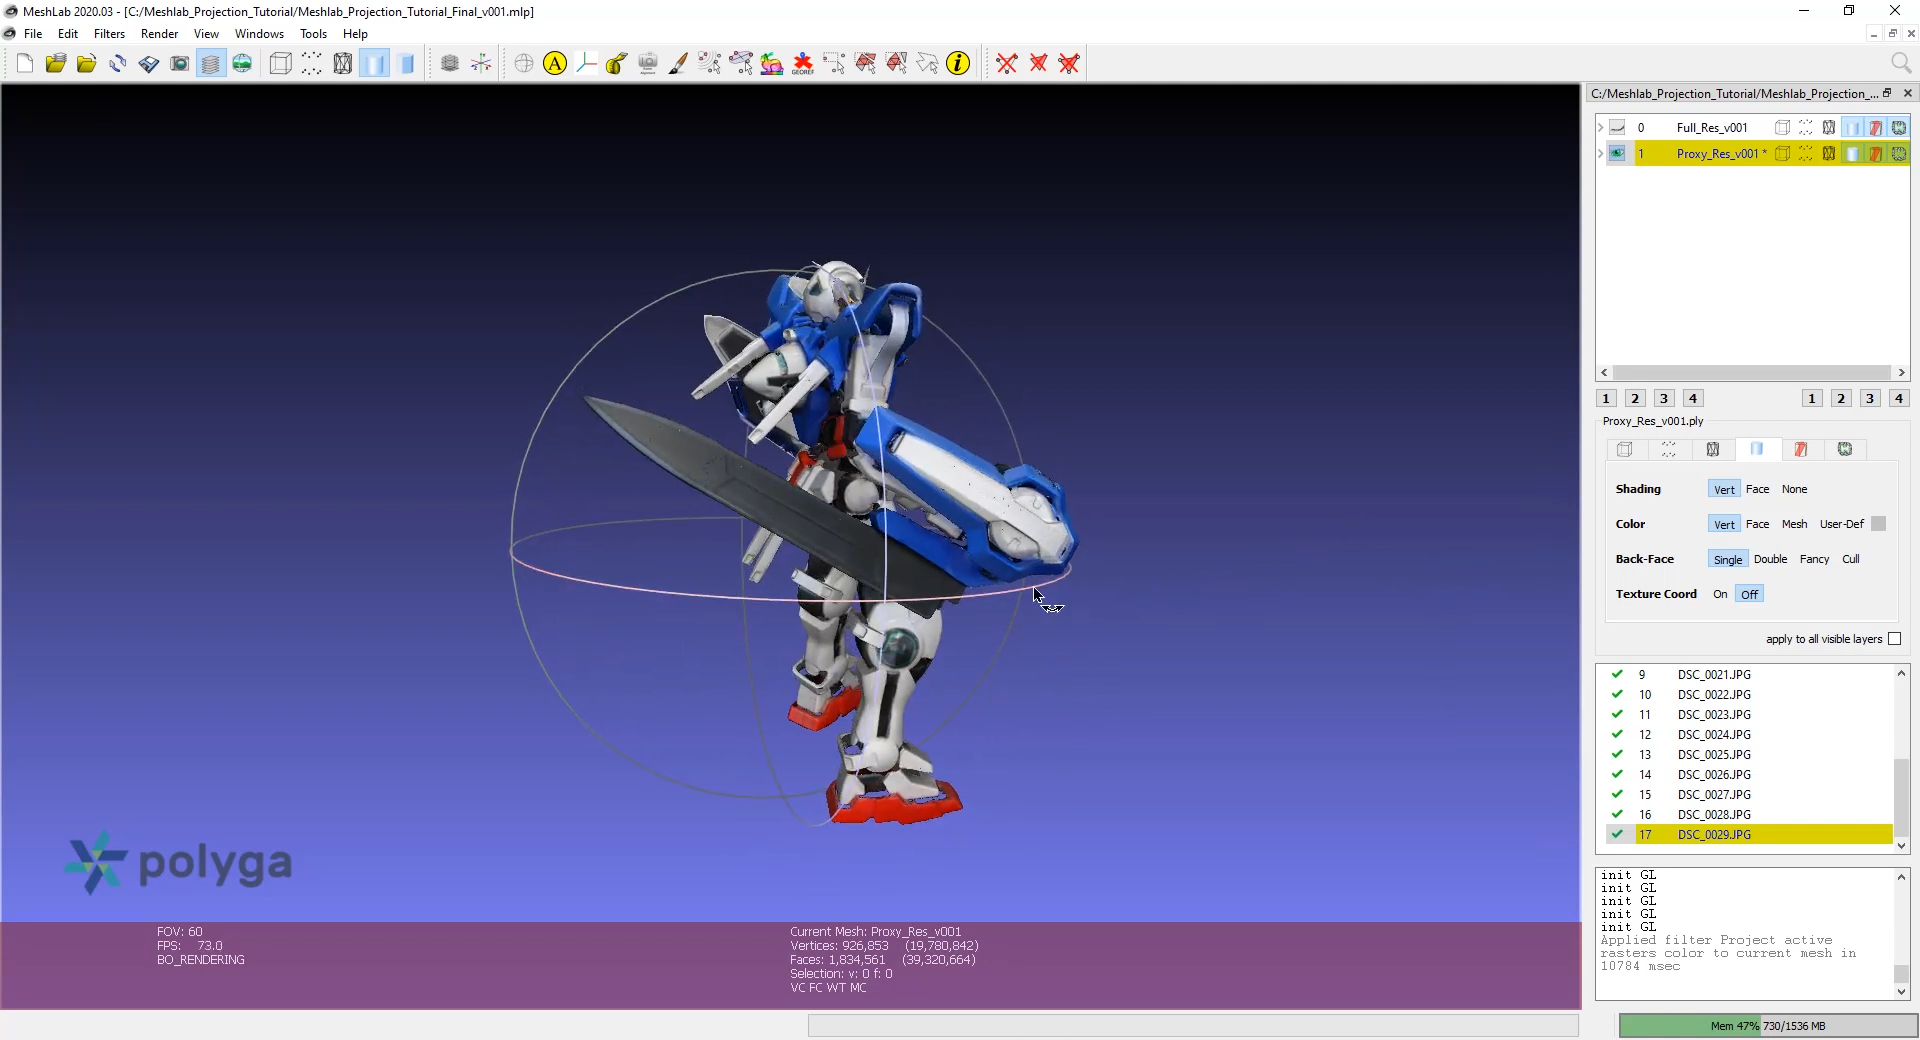
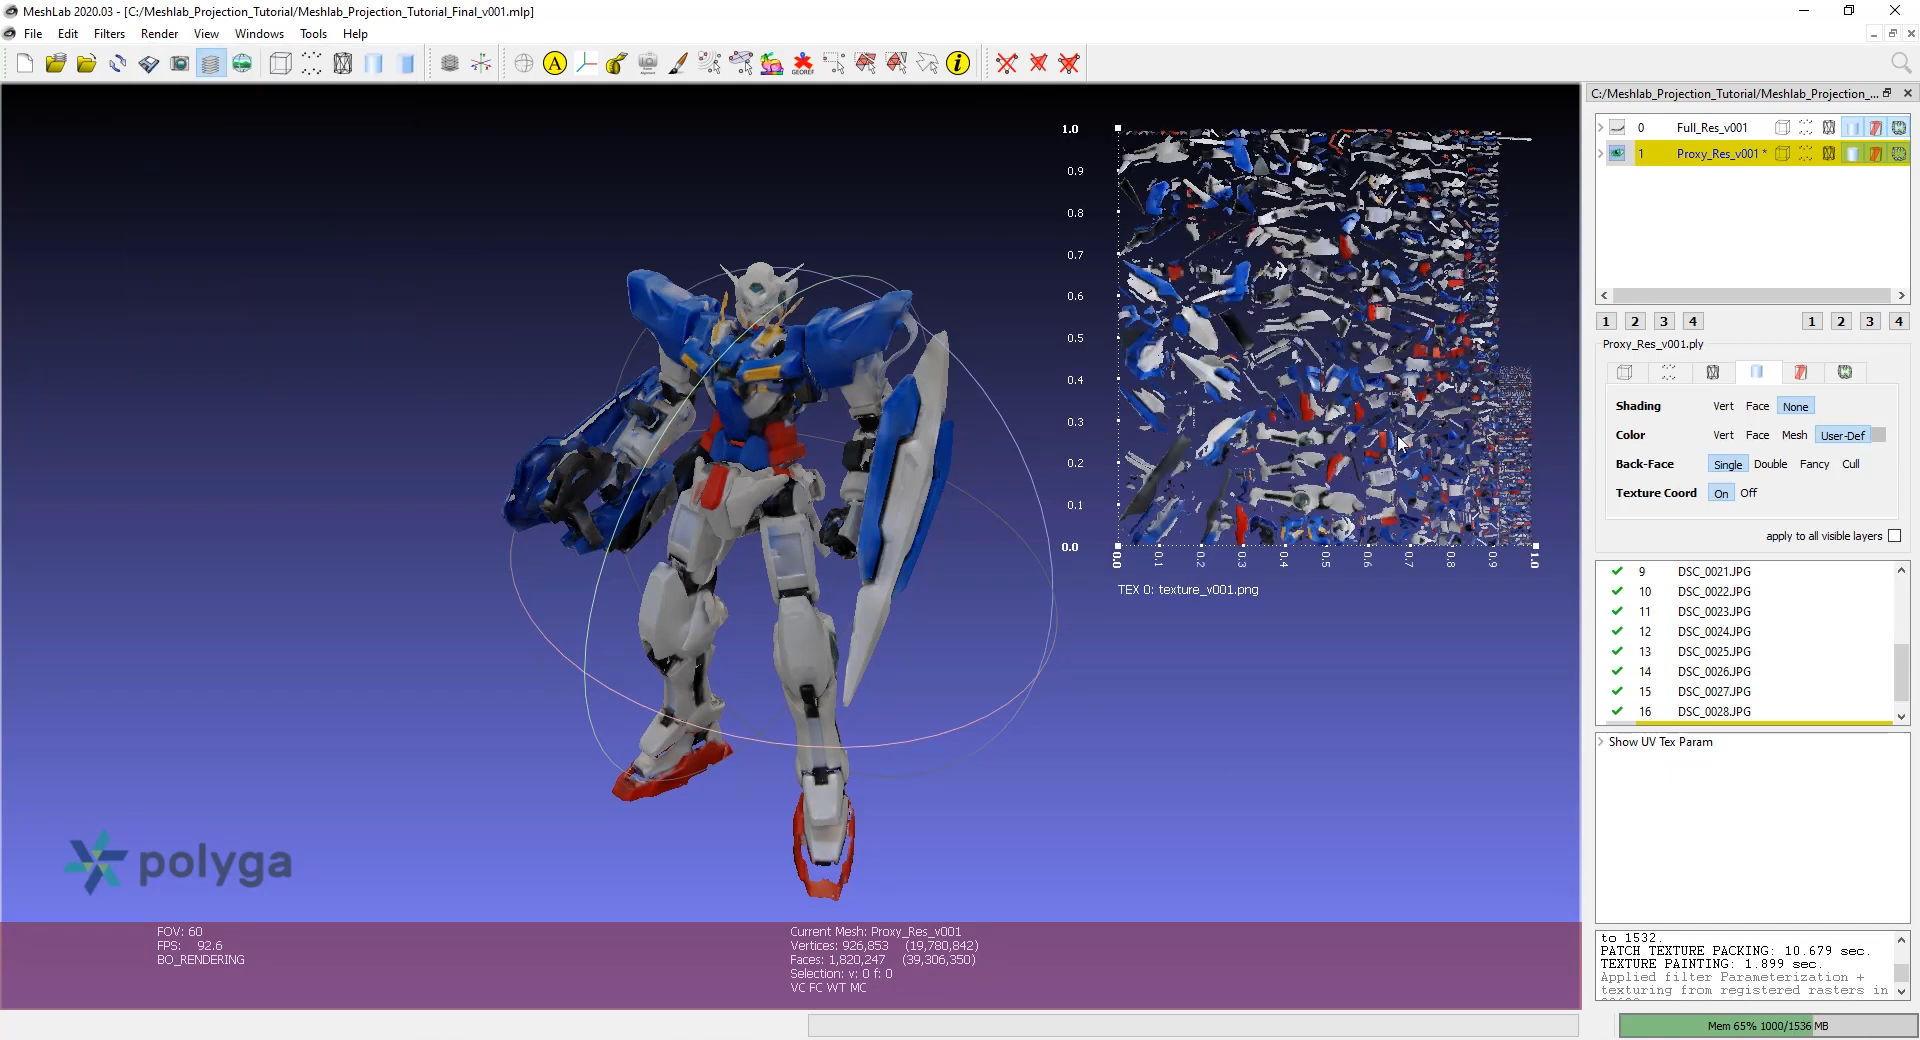
And as you can see we now have a full coverage vertex color map of the model with no visible seams. If you’d like to also generate UVs and a texture map it’s only one additional step.
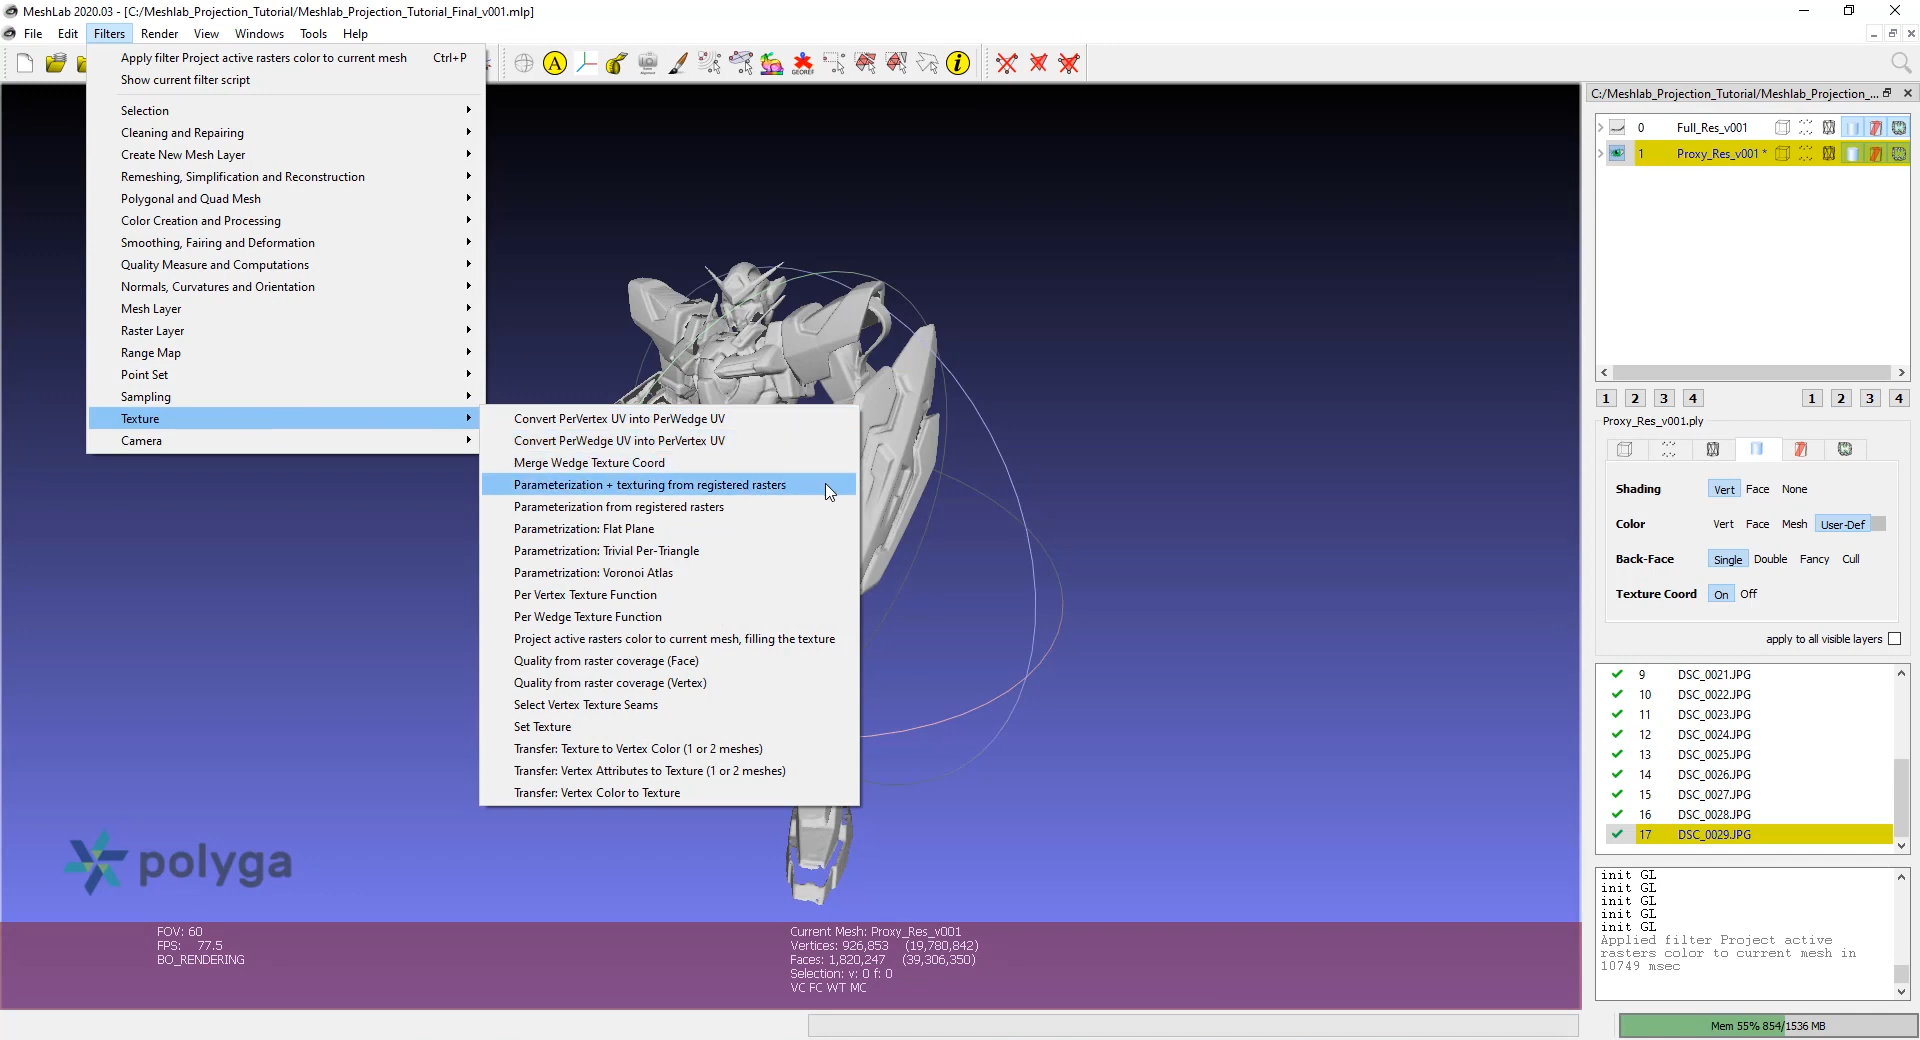
Go to filters > texture > parametrization and texturing from registered rasters.
In the options panel we can set our texture resolution in pixels and name our texture file. The texture file will be saved in the same location as your project file.
To see the UV projected texturing we need to set our shading to none and our color to user-defined. Then make sure texture coordinates on the layer panel is set to on.

Now we’re looking at the UV texture mapped model.
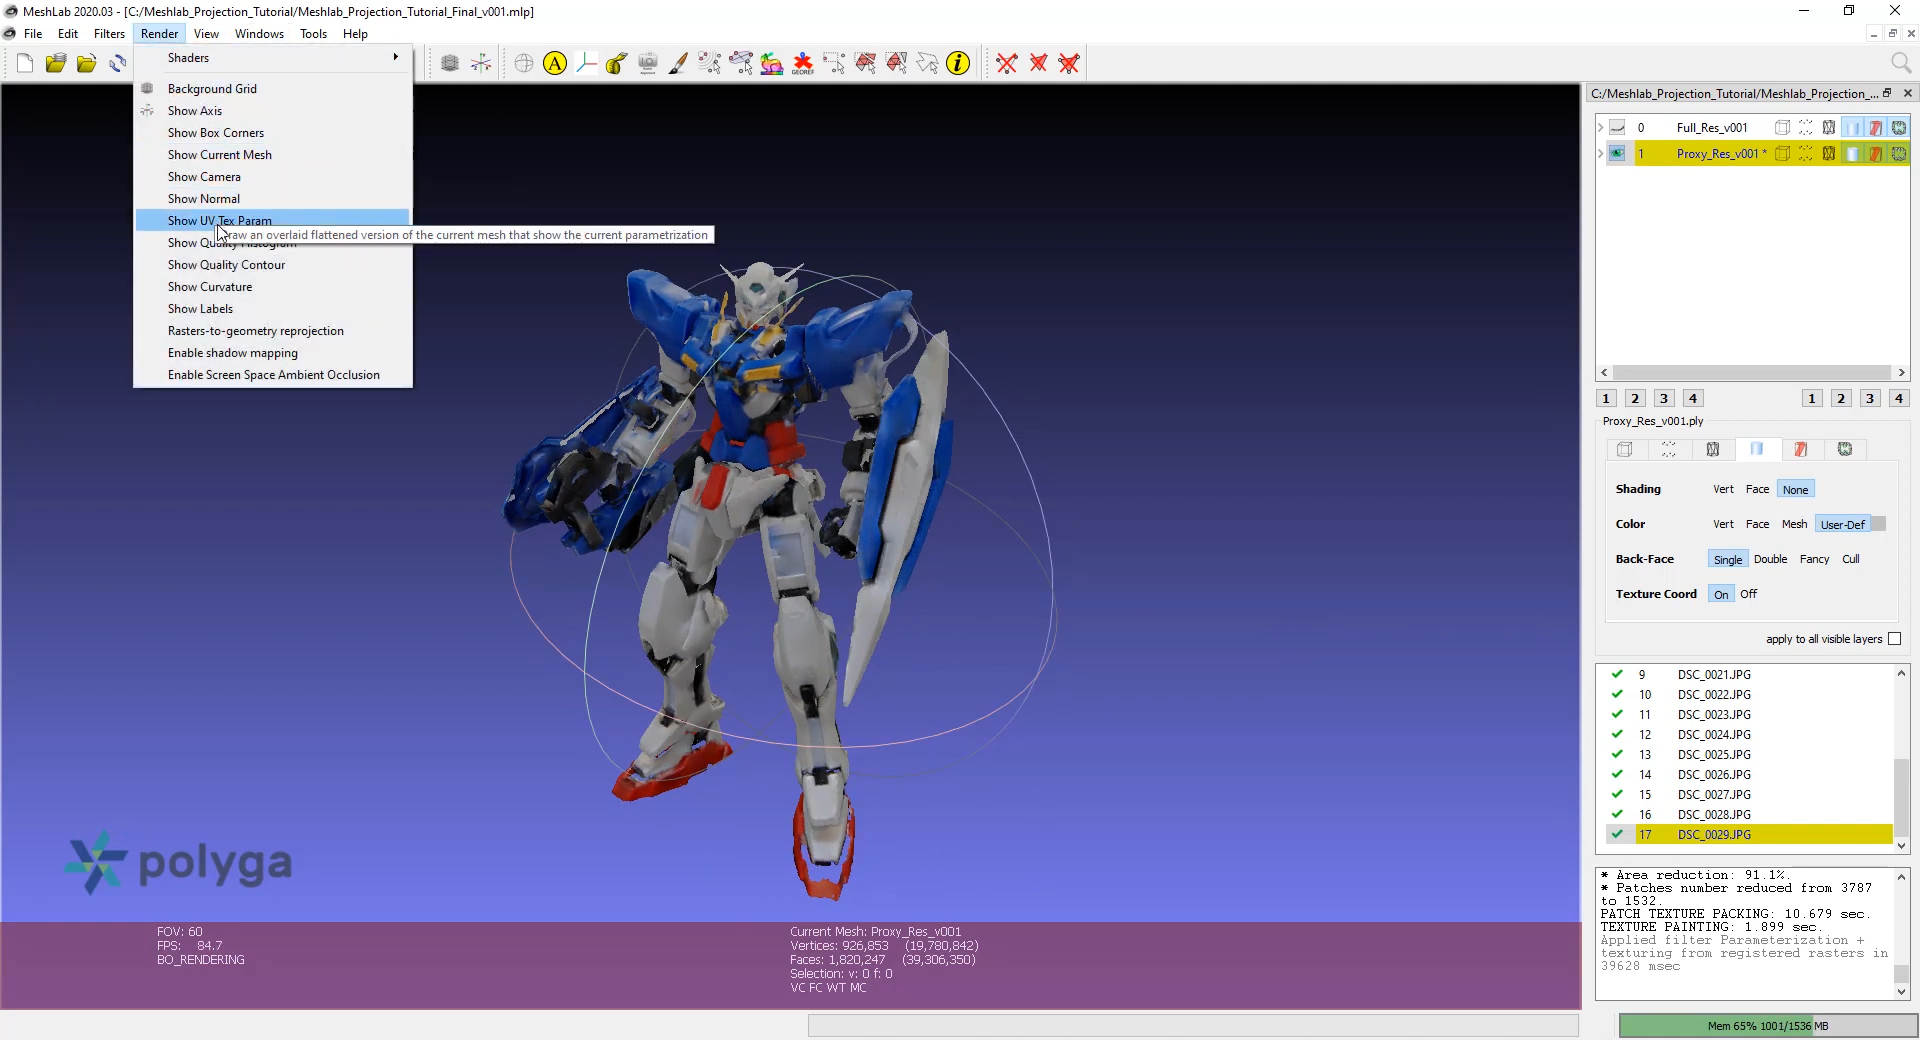
If you’d like to see the texture map itself, we can activate render > show UV texture parameter, to toggle its visibility on or off.
Up until this point we’ve been building color maps onto the proxy model. This keeps things fast until we’re happy with the results. When you’re ready to build color maps to the full res model, hide the proxy model in the layer editor and unhide the full res model.
With the full res model selected re-run the filters > camera > project active raster colors to current mesh.
When you’re happy with your results it’s time to export your color map to mesh from Meshlab.
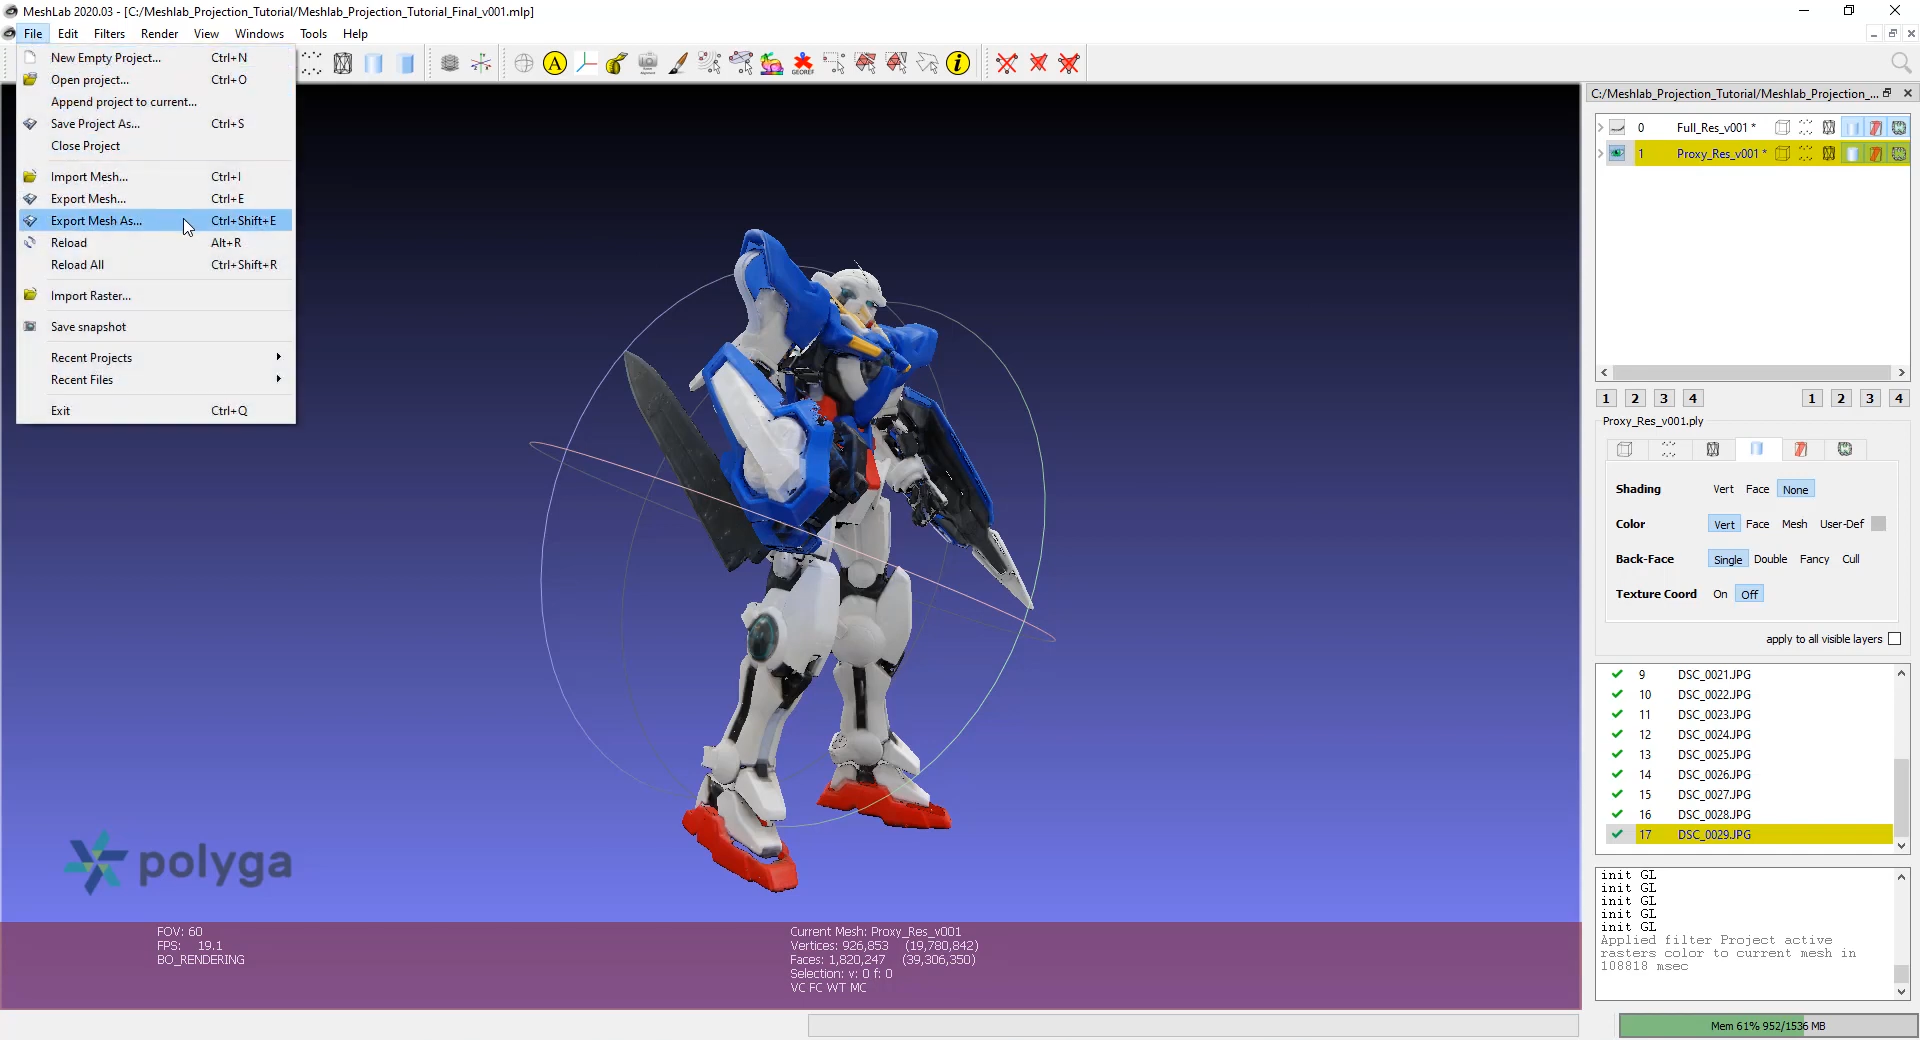
Select the mesh you’d like to export, and then go to file > export mesh, and enter a file name and format for your new mesh. We’ll keep the default options to export both vertex color and UV mapping, then click OK. And we’re done
Here’s the final result of our color mapped model.